Creating e-Commerce agent
In this tutorial, I walk you through the process of creating an e-commerce agent using Open Agents Builder. I demonstrate how to set up a template, interact with a product catalog, and make an order seamlessly. I also highlight the integration capabilities with e-commerce platforms and the automatic generation of product variants and descriptions. Please make sure to create your free account at openagentsbuilder.com to follow along!
1. Sign up & Log in
1. Visit https://openagentsbuilder.com2. Click **Get started free** and create your account ▸ The whole process takes < 30 s.3. Log in — you’ll land in the **Open Agents Builder** workspace.2. Create a New Agent from a Template
| Action | Where to click | What happens |
|---|---|---|
| Open the Templates modal | New Agent… → Use Template | A gallery of ready‑made bots appears. |
| Choose “InstaFit – fitness shop for Instagram” | The template is copied into your workspace. | |
| Click Use template | — | Your personal copy is instantly published. |
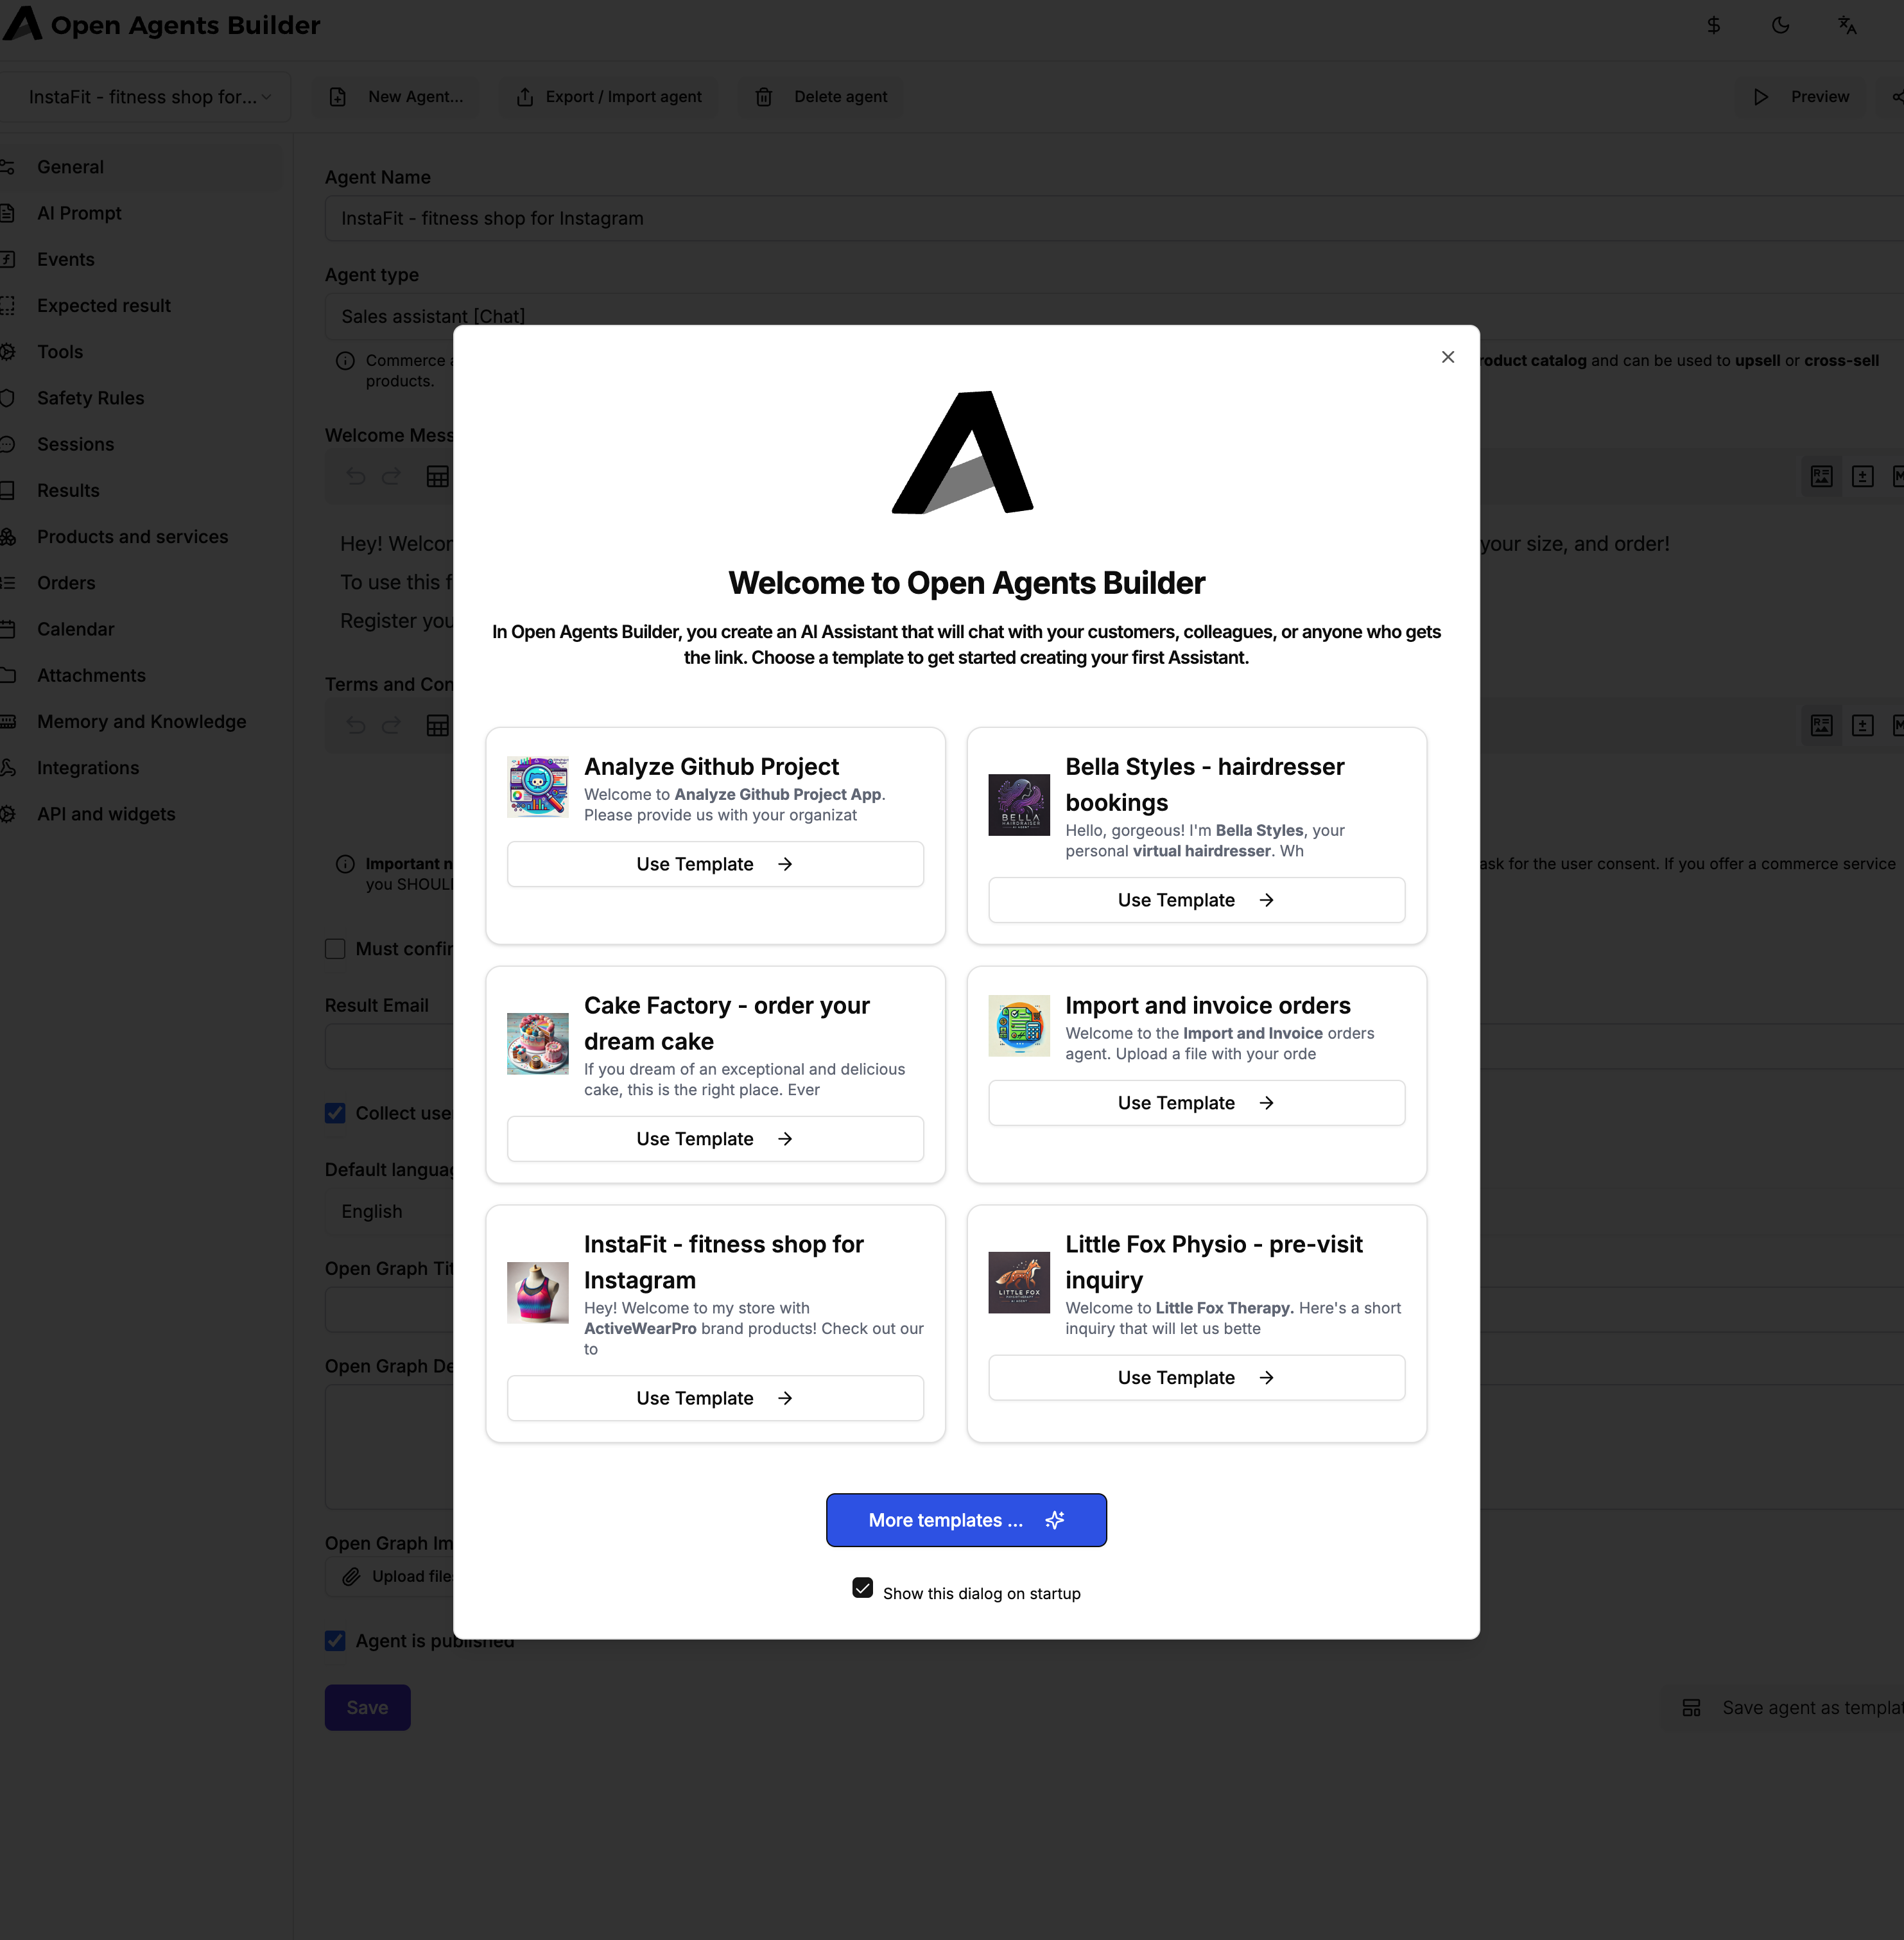
Why this template? It ships with a minimal product catalog (Gradient Performance Hoodie), a built‑in shopping cart, checkout logic, and order management screens — perfect for learning the flow.
3. Test‑drive the Agent (Front‑end)
- Press Preview in the top‑right corner of the builder.
- Shareable chat URL opens in a new tab – this is the same link you can embed on your site, IG bio, WhatsApp, etc.
- Enter a test name & e‑mail (required because the template collects user data).
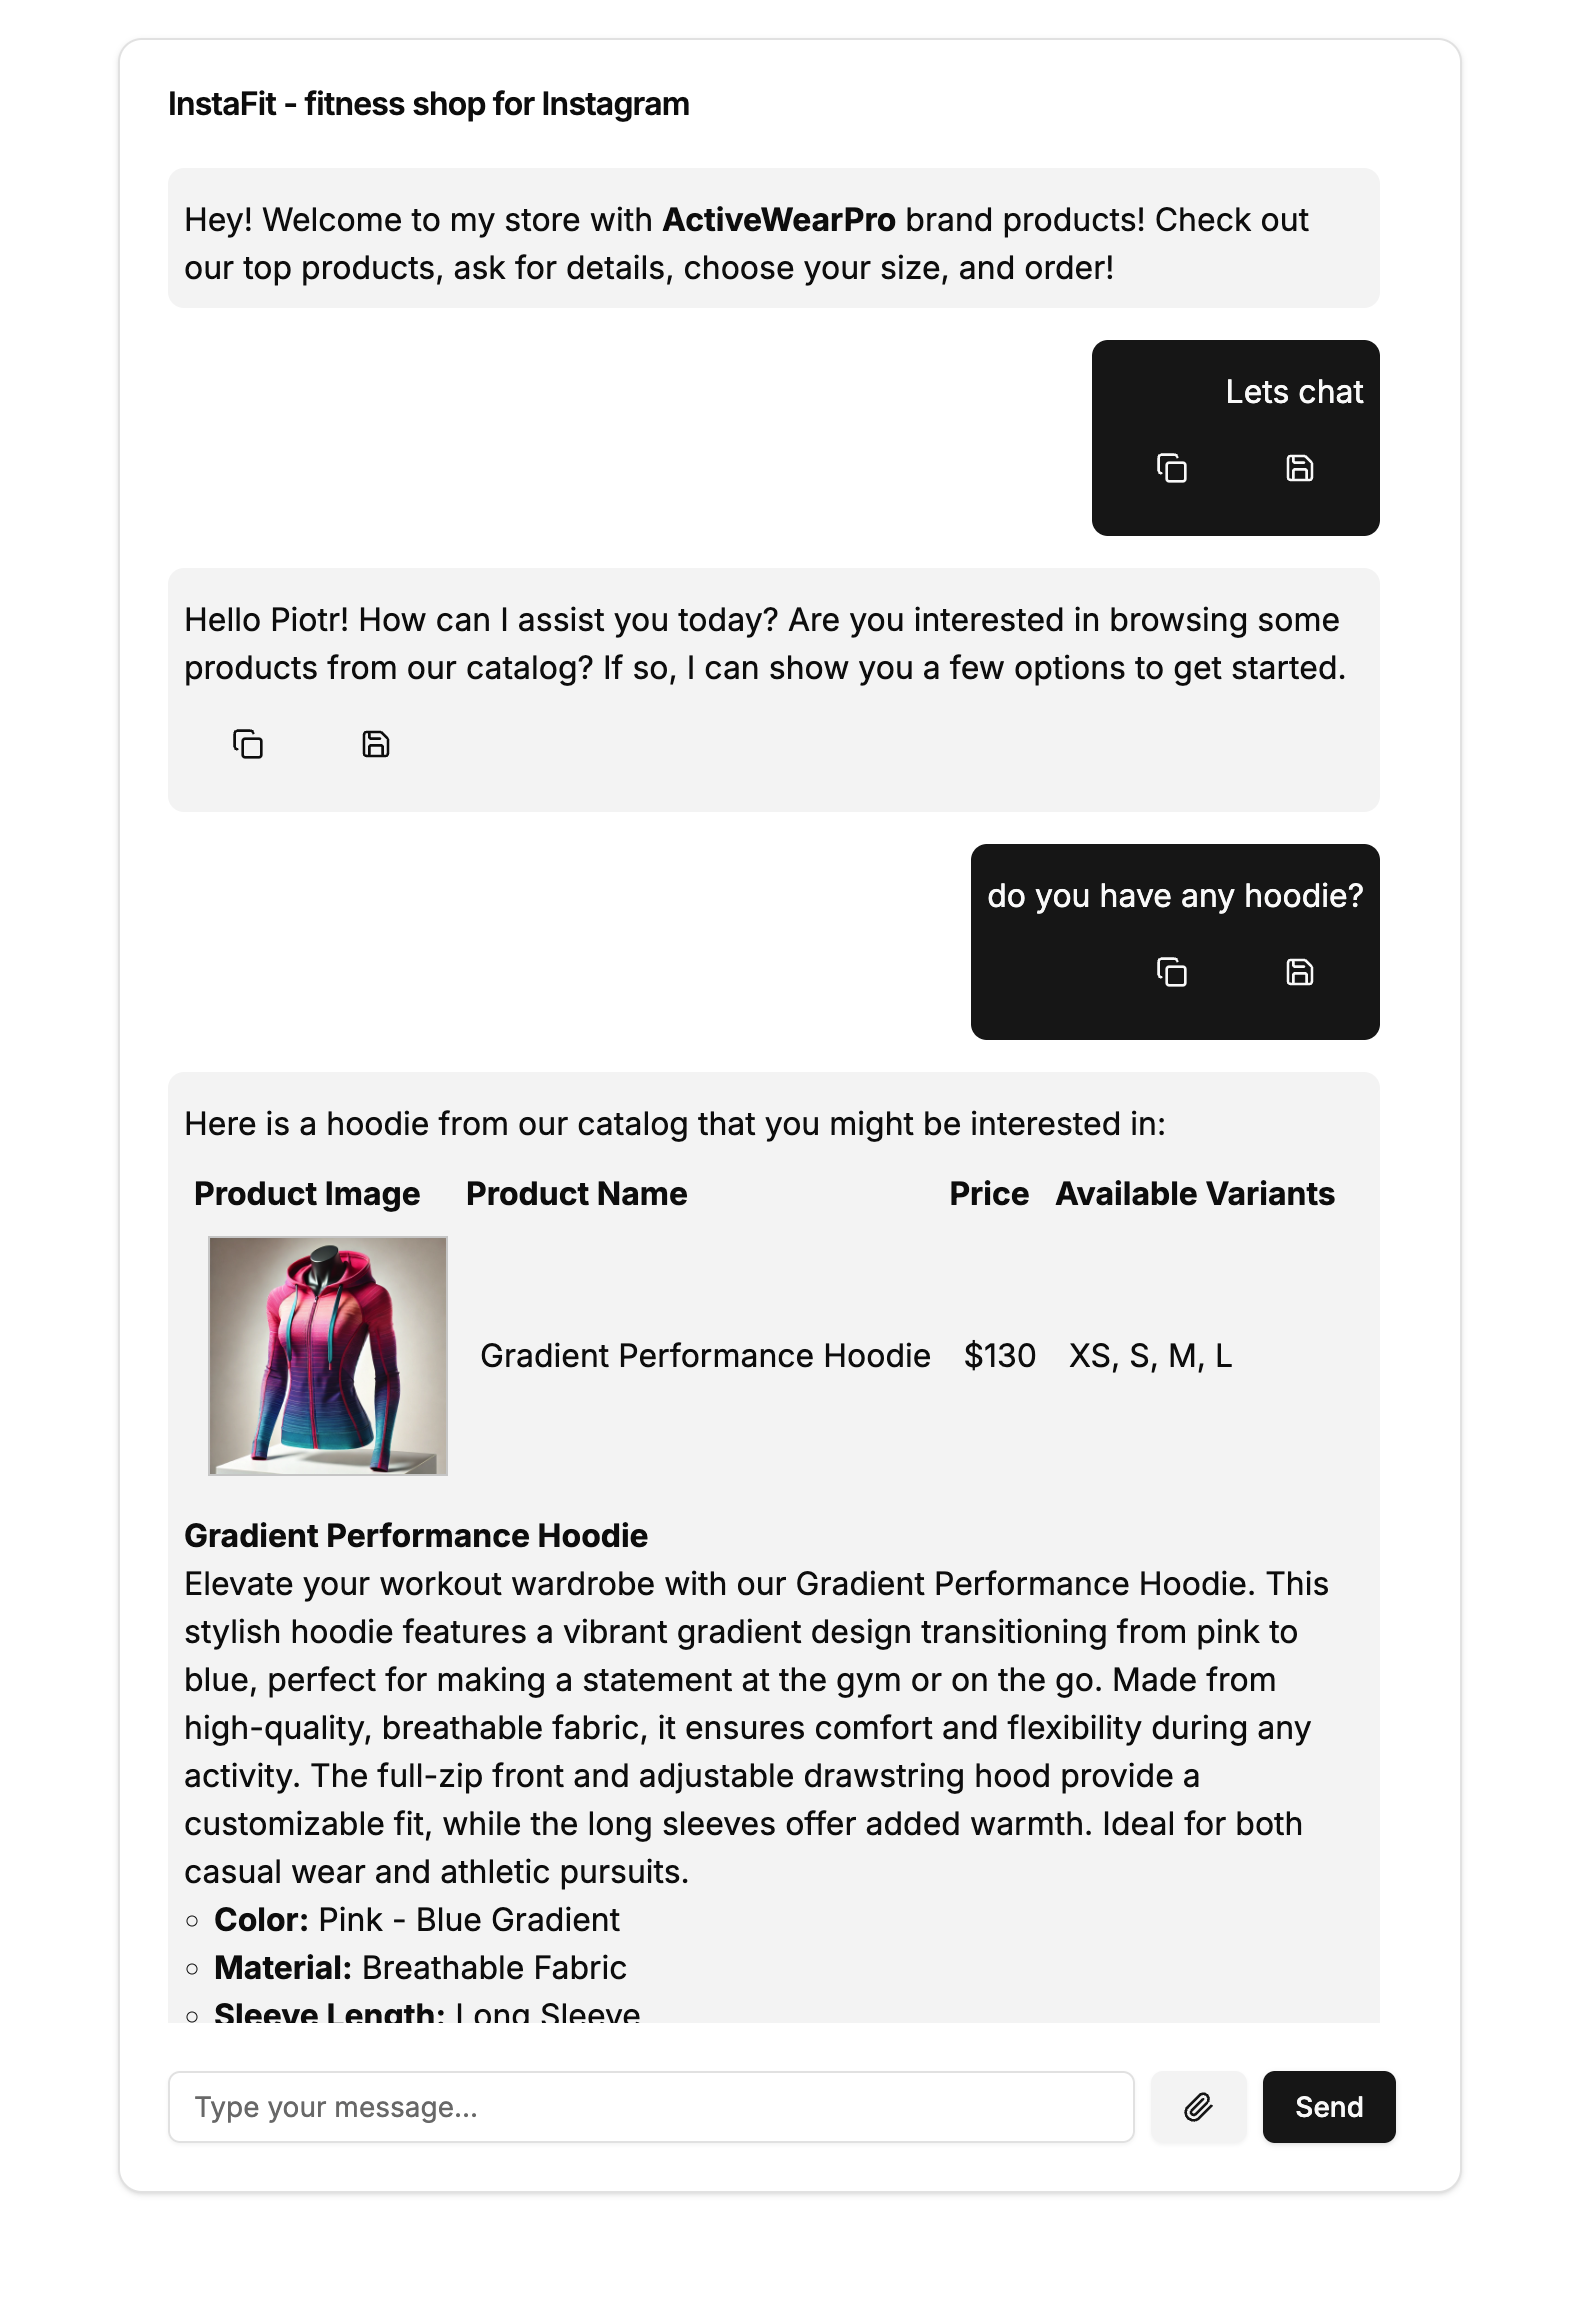
- Chat away:
The agent never hallucinates prices or SKUs – data is pulled straight from the catalog you control.User: Do you have any hoodie?Agent: [Shows Gradient Performance Hoodie, price $130, sizes XS‑L]User: I’ll take size MAgent: Adds item to the cart, shows order summaryUser: Please make the order, my name is John Doe, New York City, 46 Street 52, 23W42Agent: Generates order confirmation + Order ID, and promises a payment link
4. Inspect the Order (Back‑office)
- In the builder, open Orders in the left sidebar.
- You’ll see two cards by default:
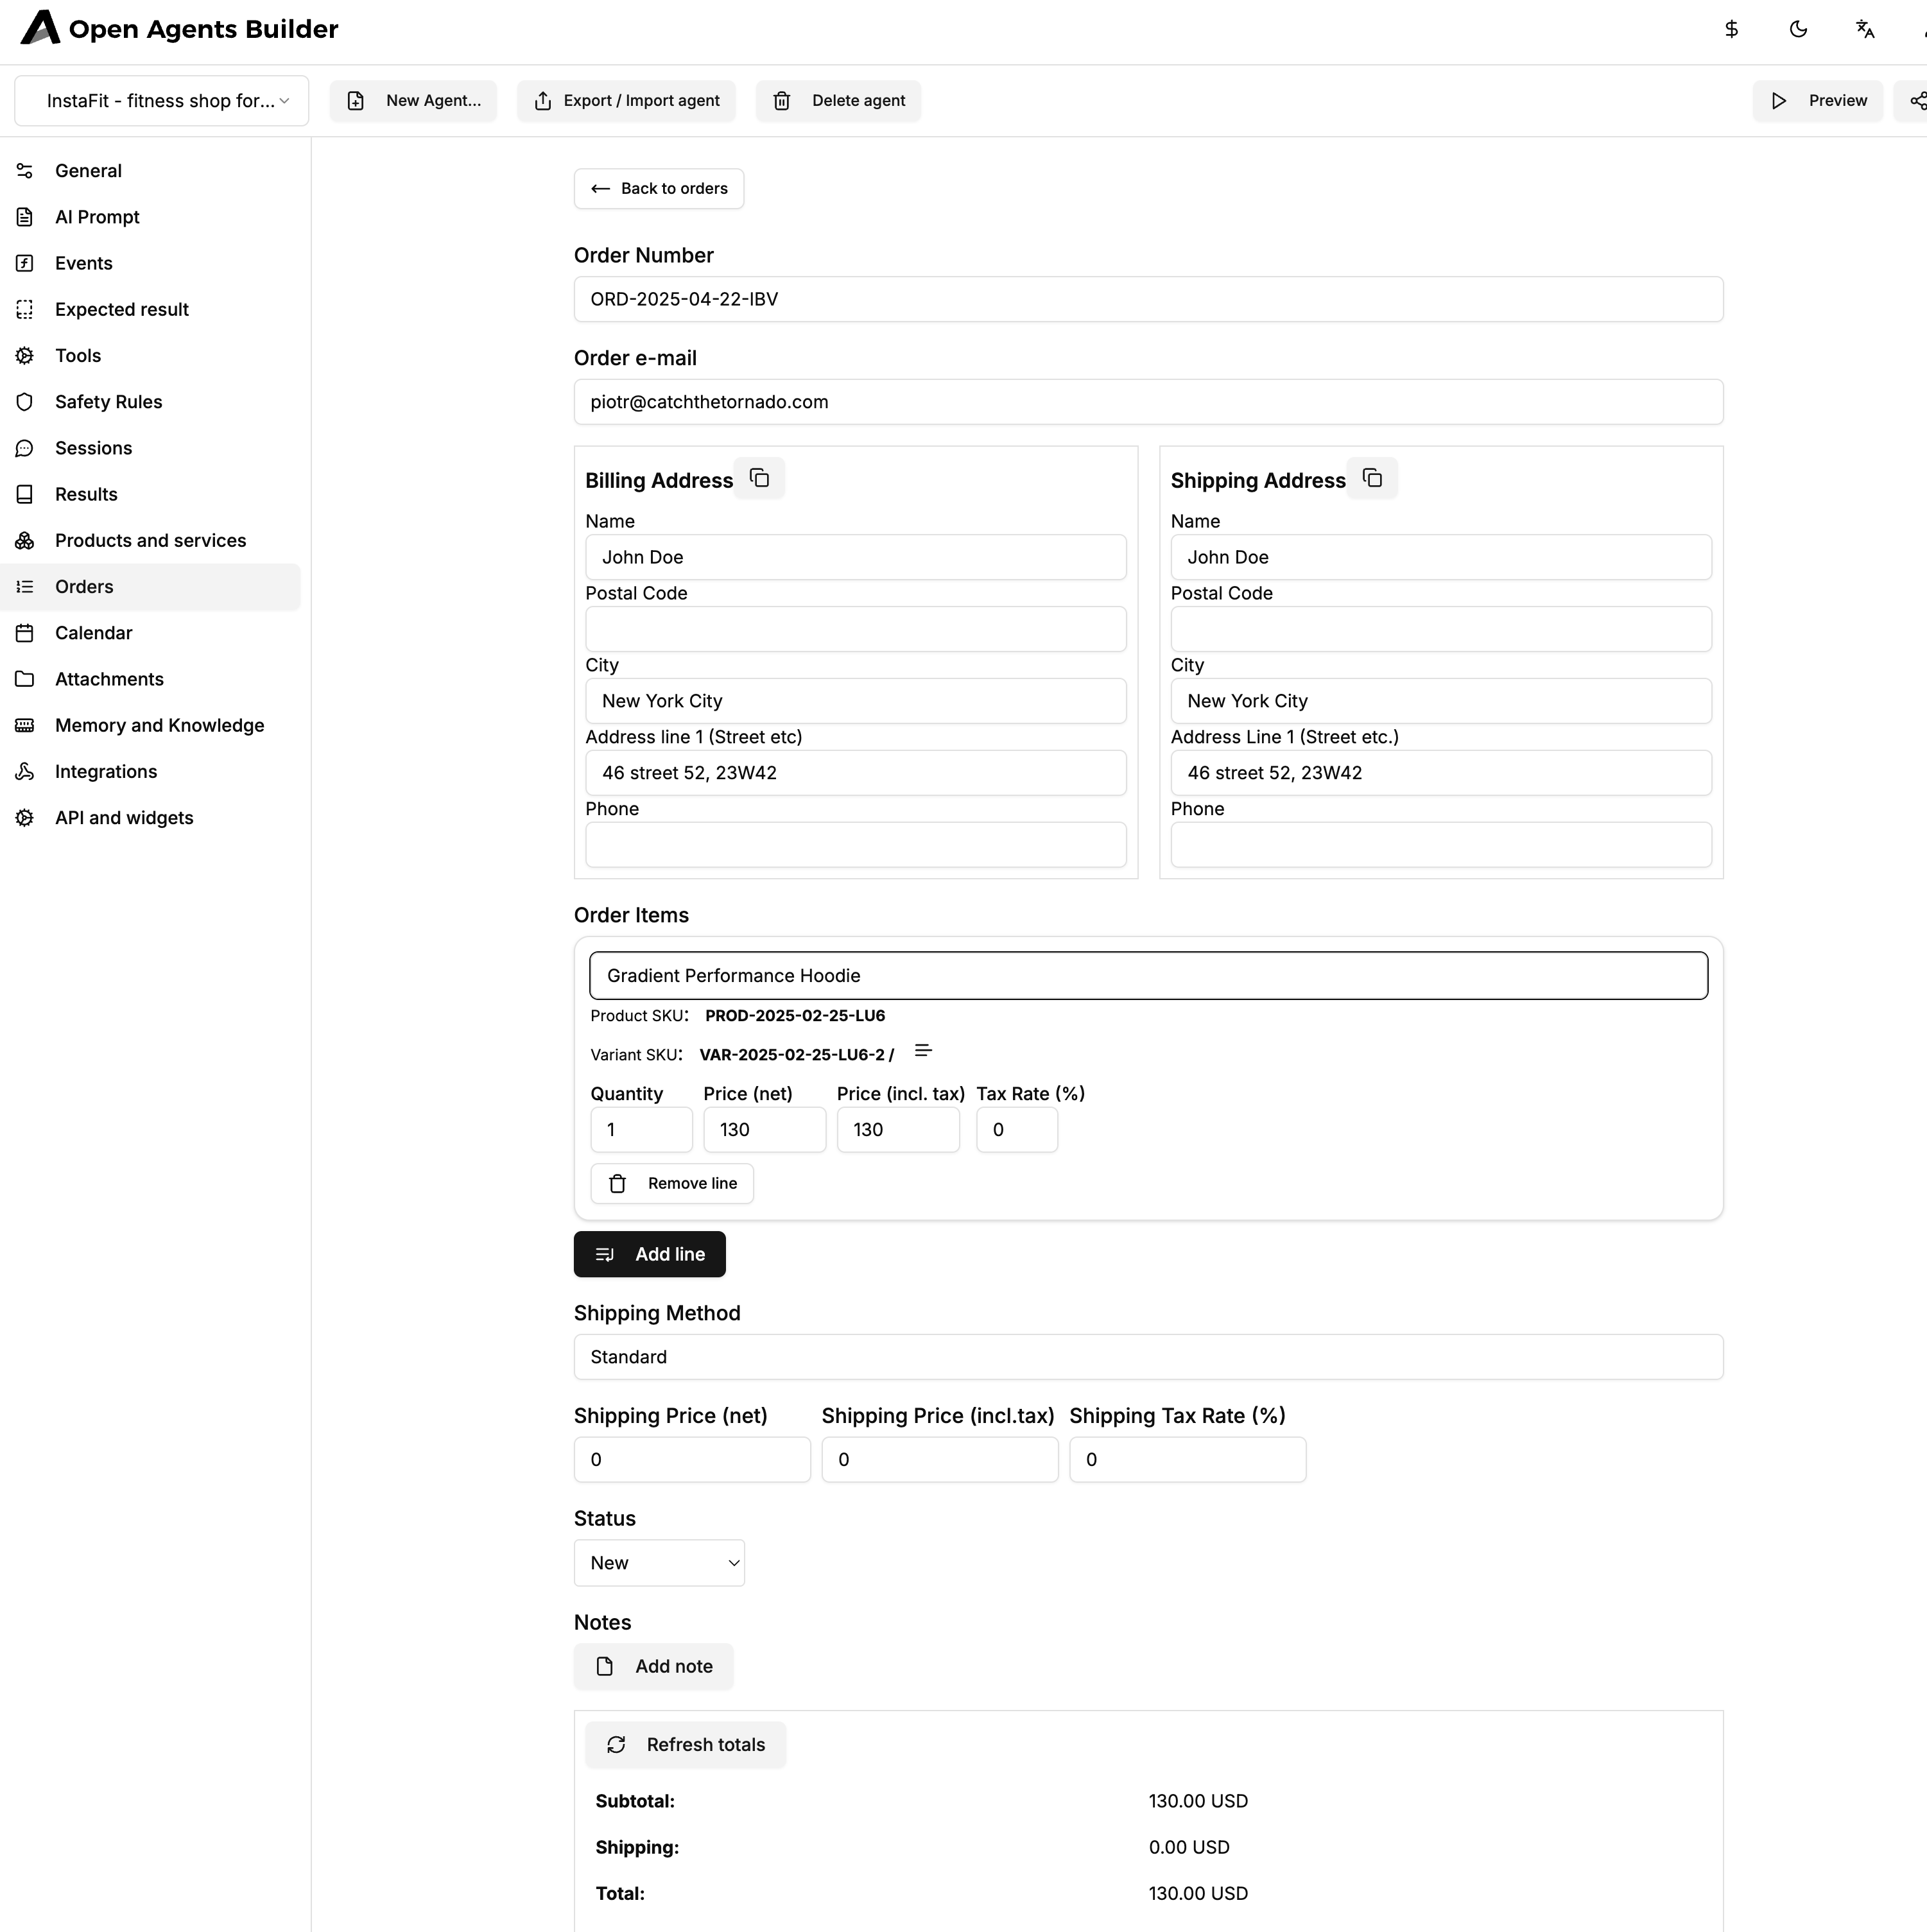
- #ORD‑YYYY‑MM‑DD‑IBV – status = New
- Shopping Cart – the live cart for the current chat session
- Click the order card to view details: billing/shipping address, line items, tax, shipping method, totals, internal notes, status dropdown, etc.
5. Manage the Product Catalog
5.1 Product Information (PIM)
- Navigate to Products and services → Gradient Performance Hoodie
- Fields you can edit:
- Images – upload any number, reorder, crop
- Description – rich‑text or auto‑generated from an image (see §5.3)
- Attributes – Color, Material, Size, Feature …
- Variants – one row per SKU (price, tax, stock, etc.)
5.2 Generate Variant Combinations Automatically
- Add/select attributes (e.g.
Color: Pink|Blue,Size: S|M|L|XL). - Click Generate Variants.
- OABuilder creates all combinations (
Pink S,Pink M, …) with unique SKUs and inherits pricing — massive time‑saver.
5.3 AI‑assist: Write Descriptions from Photos
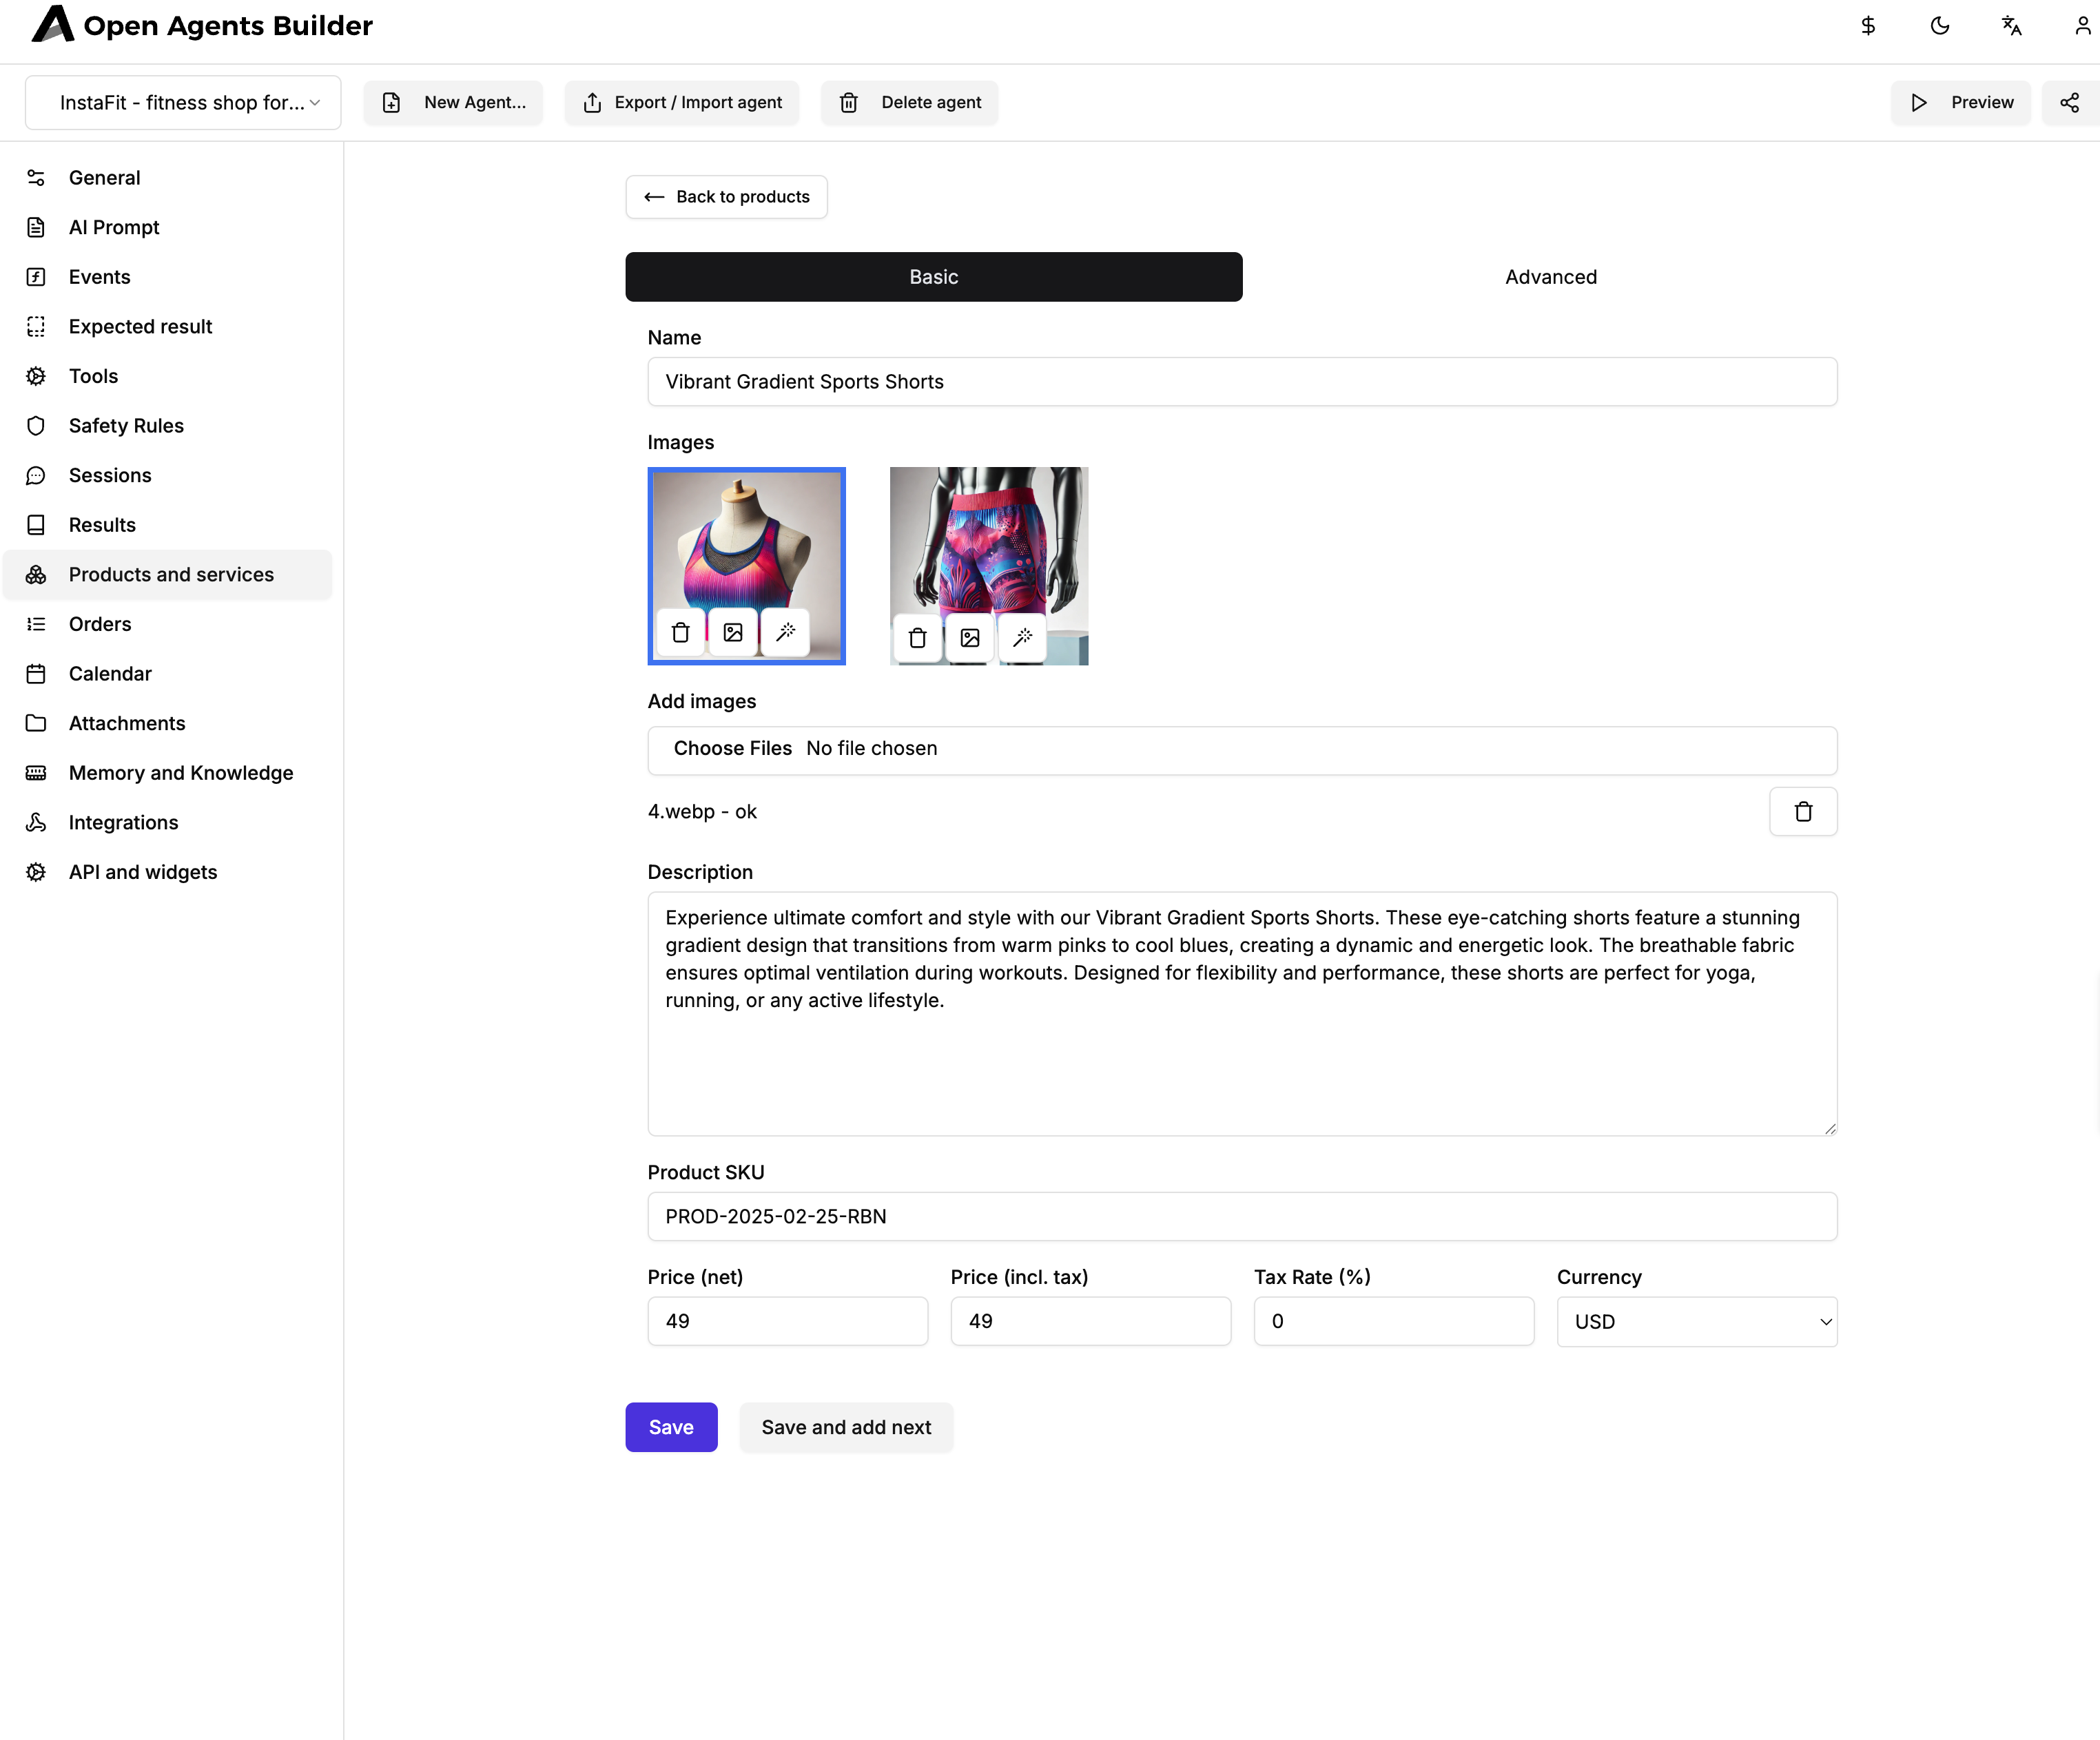
- Inside a product, drop a new photo into Images.
- Hit 🪄 Generate (magic‑wand icon).
- The builder writes:
- A marketing description (“Elevate your workout wardrobe…”)
- Suggested attribute values (Material, Sleeve Length, etc.)
6. Configure Shipping, Payments, Statuses
| Setting | Where | Notes |
|---|---|---|
| Shipping methods | Orders → Shipping Method | Add flat rates, per‑region pricing, or API‑driven carriers. |
| Payment link / provider | Integrations | Plug in Stripe, PayPal, manual invoice, etc. |
| Order statuses | Orders → Status dropdown | Draft → New → Paid → Shipped → Completed (customizable). |
7. Share or Embed Your Agent
- Public chat URL (found under Preview) – paste in Instagram bio, Stories “link sticker”, Facebook, WhatsApp, email campaigns…
- iFrame script – copy from API and widgets to embed on any webpage.
- Zapier / Make / Webhooks – automate notifying fulfillment centers, CRMs, sheets, you name it. Read on how to integrate external tools.
8. Power‑tips & Next Steps
- Terms & Conditions / GDPR – toggle Must confirm T&C in General if you sell in EU.
- Custom prompts & safety rules – fine‑tune how the AI replies (tab AI Prompt & Safety Rules).
- Multi‑language storefront – set Default language per agent or use dynamic
localedetection. - Inventory sync – connect your existing e‑commerce DB via the Integrations tab; OABuilder becomes a chat front‑end, orders flow back automatically.
- Analytics – each chat session appears under Sessions with full transcripts for QA and marketing insights.
9. Cheat‑sheet (Copy & Keep)
1. New Agent → Use Template → InstaFit2. Preview link → test chat, add to cart, place order3. Orders tab → verify order data4. Products & services → edit item, Generate Variants 🪄5. Images → 🪄 Generate description6. Configure shipping, payment, statuses7. Share the public URL or embed widgetHappy selling! 🎉 Every order captured by the bot hits your Orders dashboard in real time, 100 % driven by the data you just configured.