Integrating Agent with your Website
This guide shows you how to embed the Open Agents Builder chat widget on your website. With this widget, users can directly interact with your agent.
Prerequisites
- Verified Open Agents Builder account (make sure you have an active account and a verified email address).
- Access to your website’s source files (to paste the code snippet).
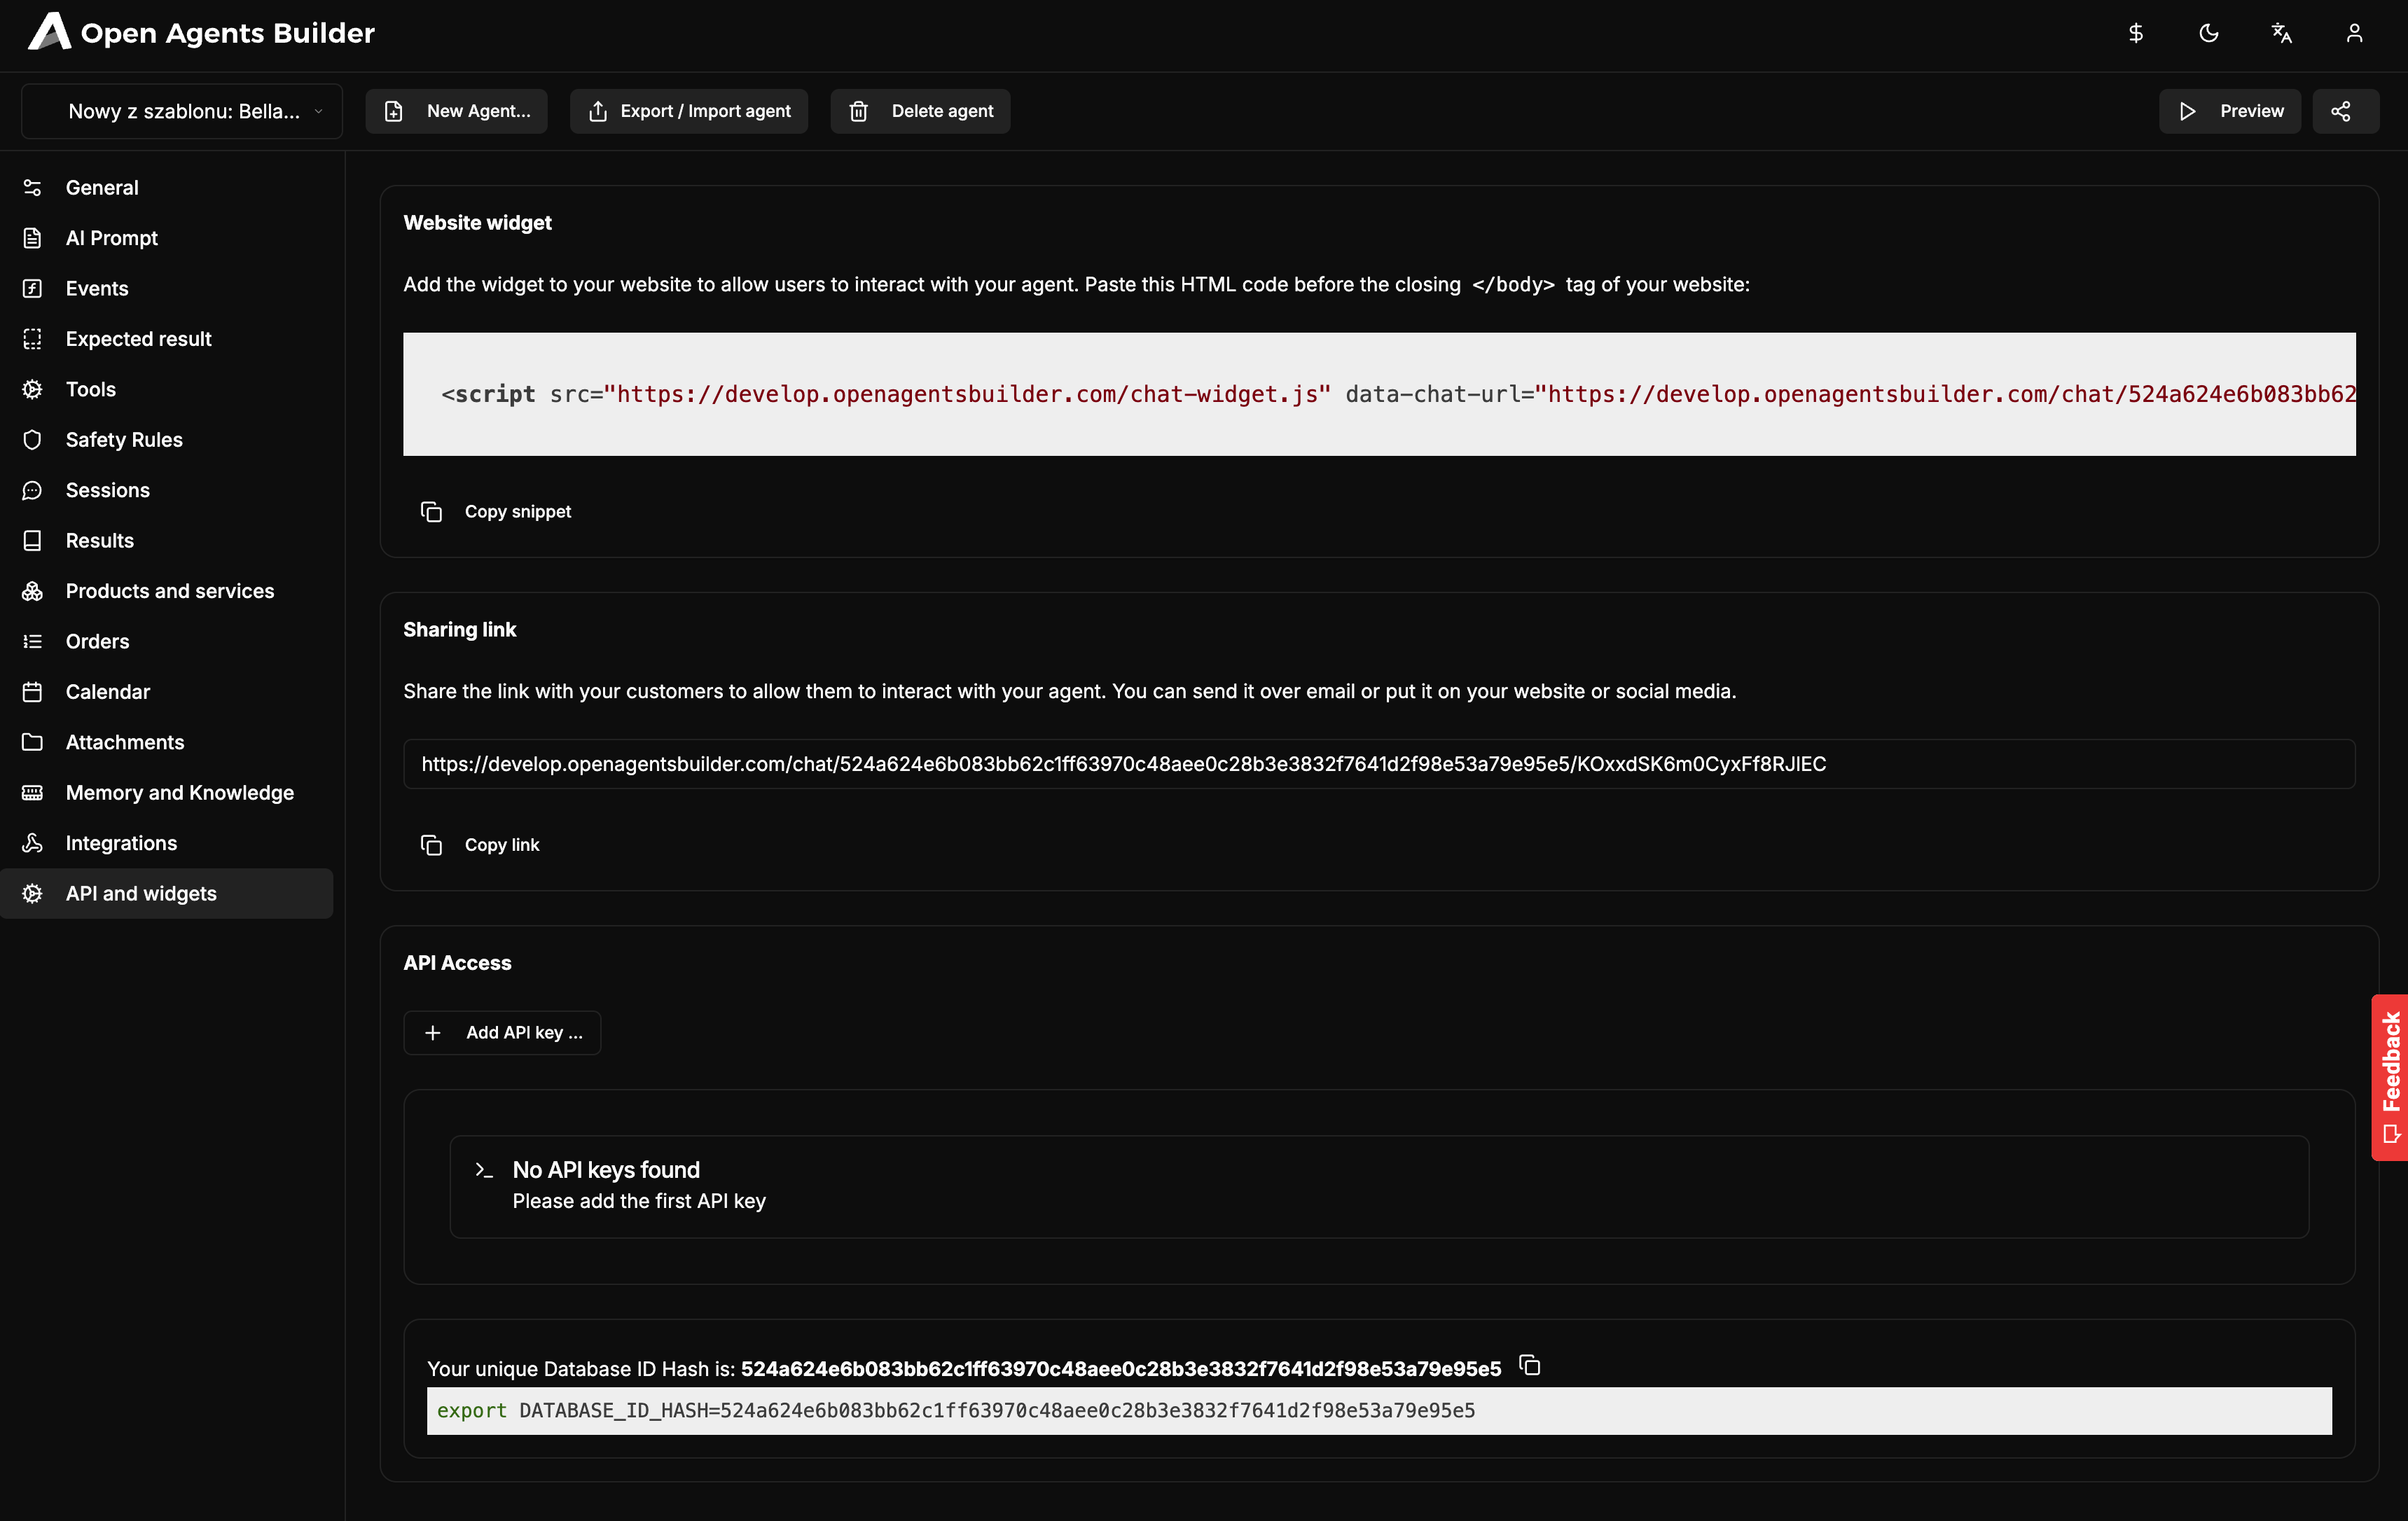
Step 1: Obtain the widget code
- Go to the API & Widgets (or similarly named) section in the Open Agents Builder dashboard.
- Copy the JavaScript snippet shown in the Website Widget section, for example:
<script src="https://app.openagentsbuilder.com/chat-widget.js"data-chat-url="https://app.openagentsbuilder.com/chat/524a624e60b83b6c2f1f63970c48aee0c2b83b33827fd4129f85a37e9e55?nc6pRLWFFlV_yMXGCNnf5"></script>
The
localhost:3000addresses are just placeholders — in your case, they might point to a different server/host.
Step 2: Embed the widget code in your website
- Open the HTML file where you want to include the widget (e.g.,
index.htmlor your main layout file). - Locate the
</body>tag — it’s typically best practice to place scripts just before the closing</body>tag. - Paste the previously copied code directly above the
</body>tag, for example:...<!-- Other content on your site --><script src="https://app.openagentsbuilder.com/chat-widget.js"data-chat-url="https://app.openagentsbuilder.com/chat/XXXXXXXXXXXXXXXXXXXXXXXXXXXXX"></script></body></html> - Save the changes and refresh (reload) your website to ensure the widget loads.
Step 3: Share a direct chat link (optional)
If you prefer users to access the chat directly (instead of embedding the widget on your page):
- Copy the Sharing link from the Open Agents Builder dashboard (found in the same section as the widget code).
- Share this link via email, social media, or on your blog.
Step 4: Configure API access (optional)
To take advantage of advanced features, you can also configure API access for your agent:
- In the API Access section of the Open Agents Builder dashboard, locate your API Key (e.g.,
ad_key_xxxxxxx). - Copy the key and keep it in a secure place.
- If you’re using a command line or another application to make HTTP requests, you can authenticate by adding the header
Authorization: Bearer ${OPEN_AGENTS_BUILDER_API_KEY}, for example:Terminal window curl -X GET \-H "Authorization: Bearer ${OPEN_AGENTS_BUILDER_API_KEY}" \-H "x-database-hash: 524a624e60b83b6c2f1f63970c48aee0c2b83b33827fd4129f85a37e9e55" \https://app.openagentsbuilder.com/api/agentx-database-hashidentifies the relevant database/instance within the service.
Step 5: Test the widget
- Visit your website where you added the script (e.g.,
https://your-domain.com). - Check if a widget button or chat box appears (usually at the bottom of the screen, depending on the CSS).
- Click or open the chat box and test a conversation with your bot.
Common Issues and Solutions
-
Widget does not appear
- Verify that you placed the script correctly just before the closing
</body>tag. - Ensure the
data-chat-urlpoints to the correct server/URL.
- Verify that you placed the script correctly just before the closing
-
Bot does not respond
- Check that the agent is active in the Open Agents Builder dashboard and that any API key (if used) is correct.
- Make sure there are no configuration errors on the bot side.
-
API issues
- Verify that your
Authorizationheader is using the correct key. - Confirm that the
x-database-hashfield is set to the value shown in the dashboard.
- Verify that your
Summary
After completing these steps, the chat widget will be available on your site, allowing users to interact with your agent through a simple interface. If you want to expand functionality, check out the advanced options for API integrations and additional configuration settings in the Open Agents Builder dashboard.
Good luck creating and deploying your agents!