Creating the API Key
Most of Open Agents Builder’s features are accessible via a REST API.
Note: There is an API client and example code available at https://github.com/CatchTheTornado/open-agents-builder-client and https://github.com/CatchTheTornado/open-agents-builder-example.
Getting Your API Key
- Create your first agent.
- Navigate to the
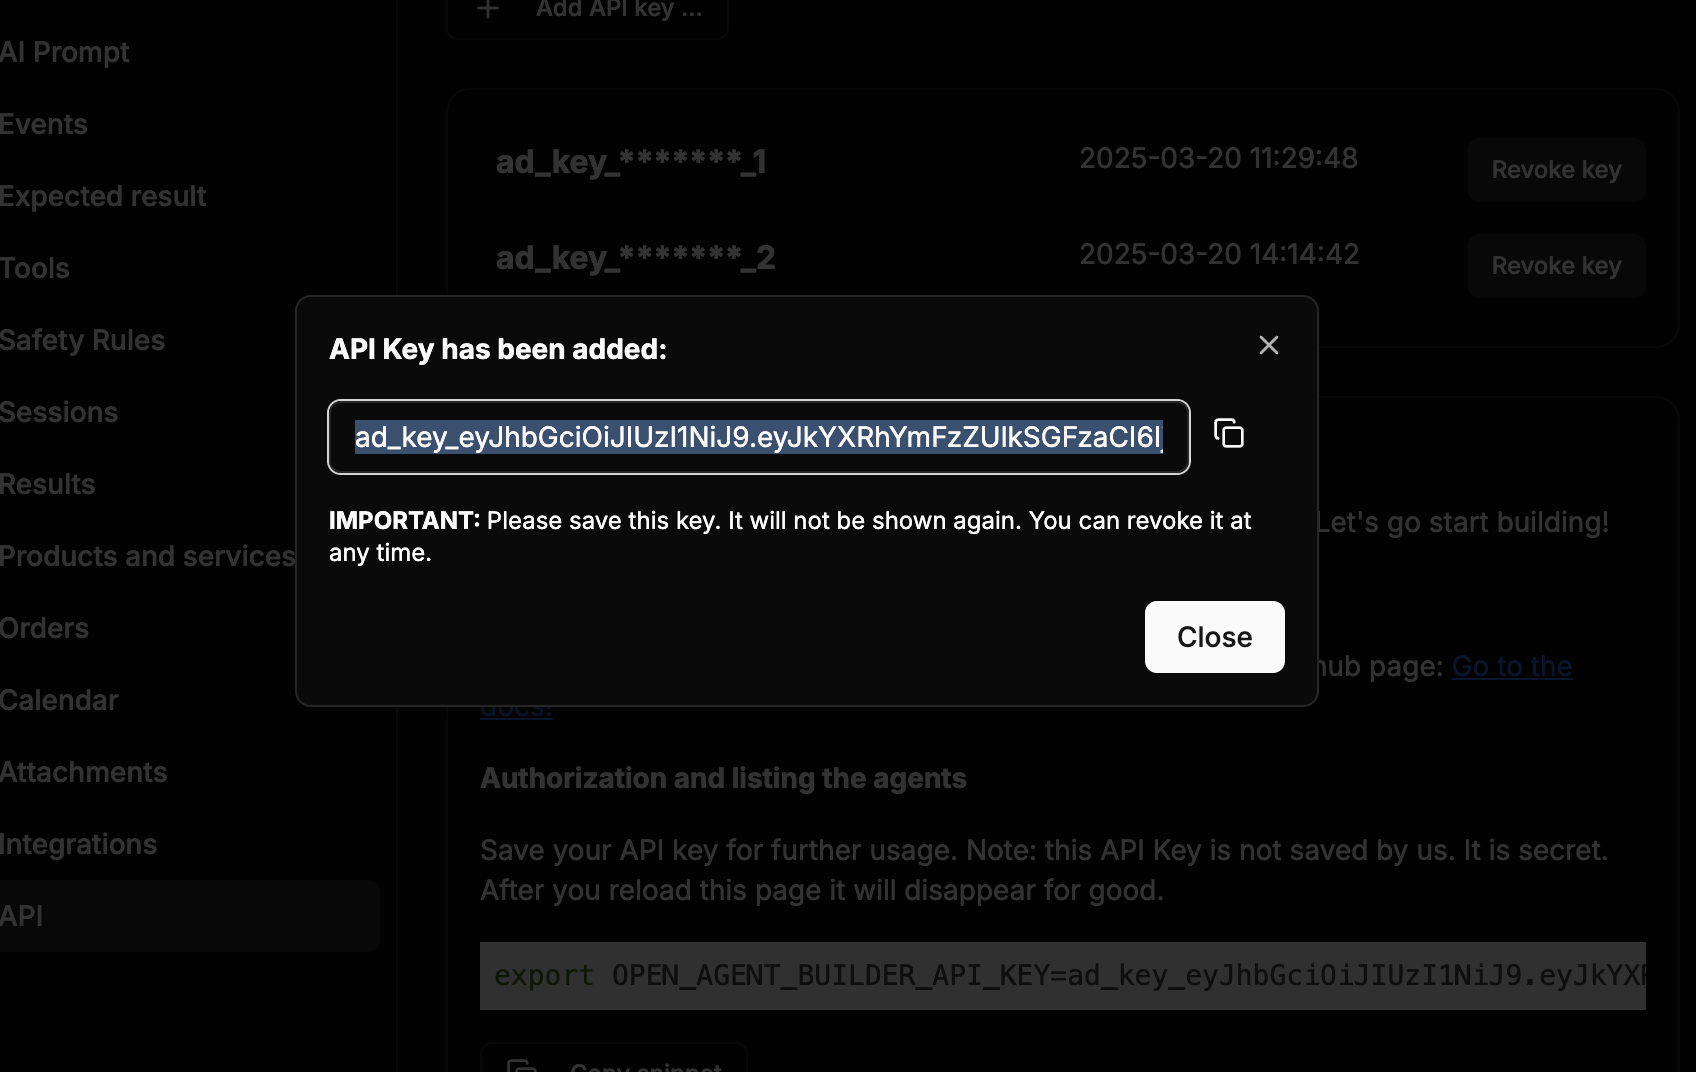
/apitab to generate a new API key.
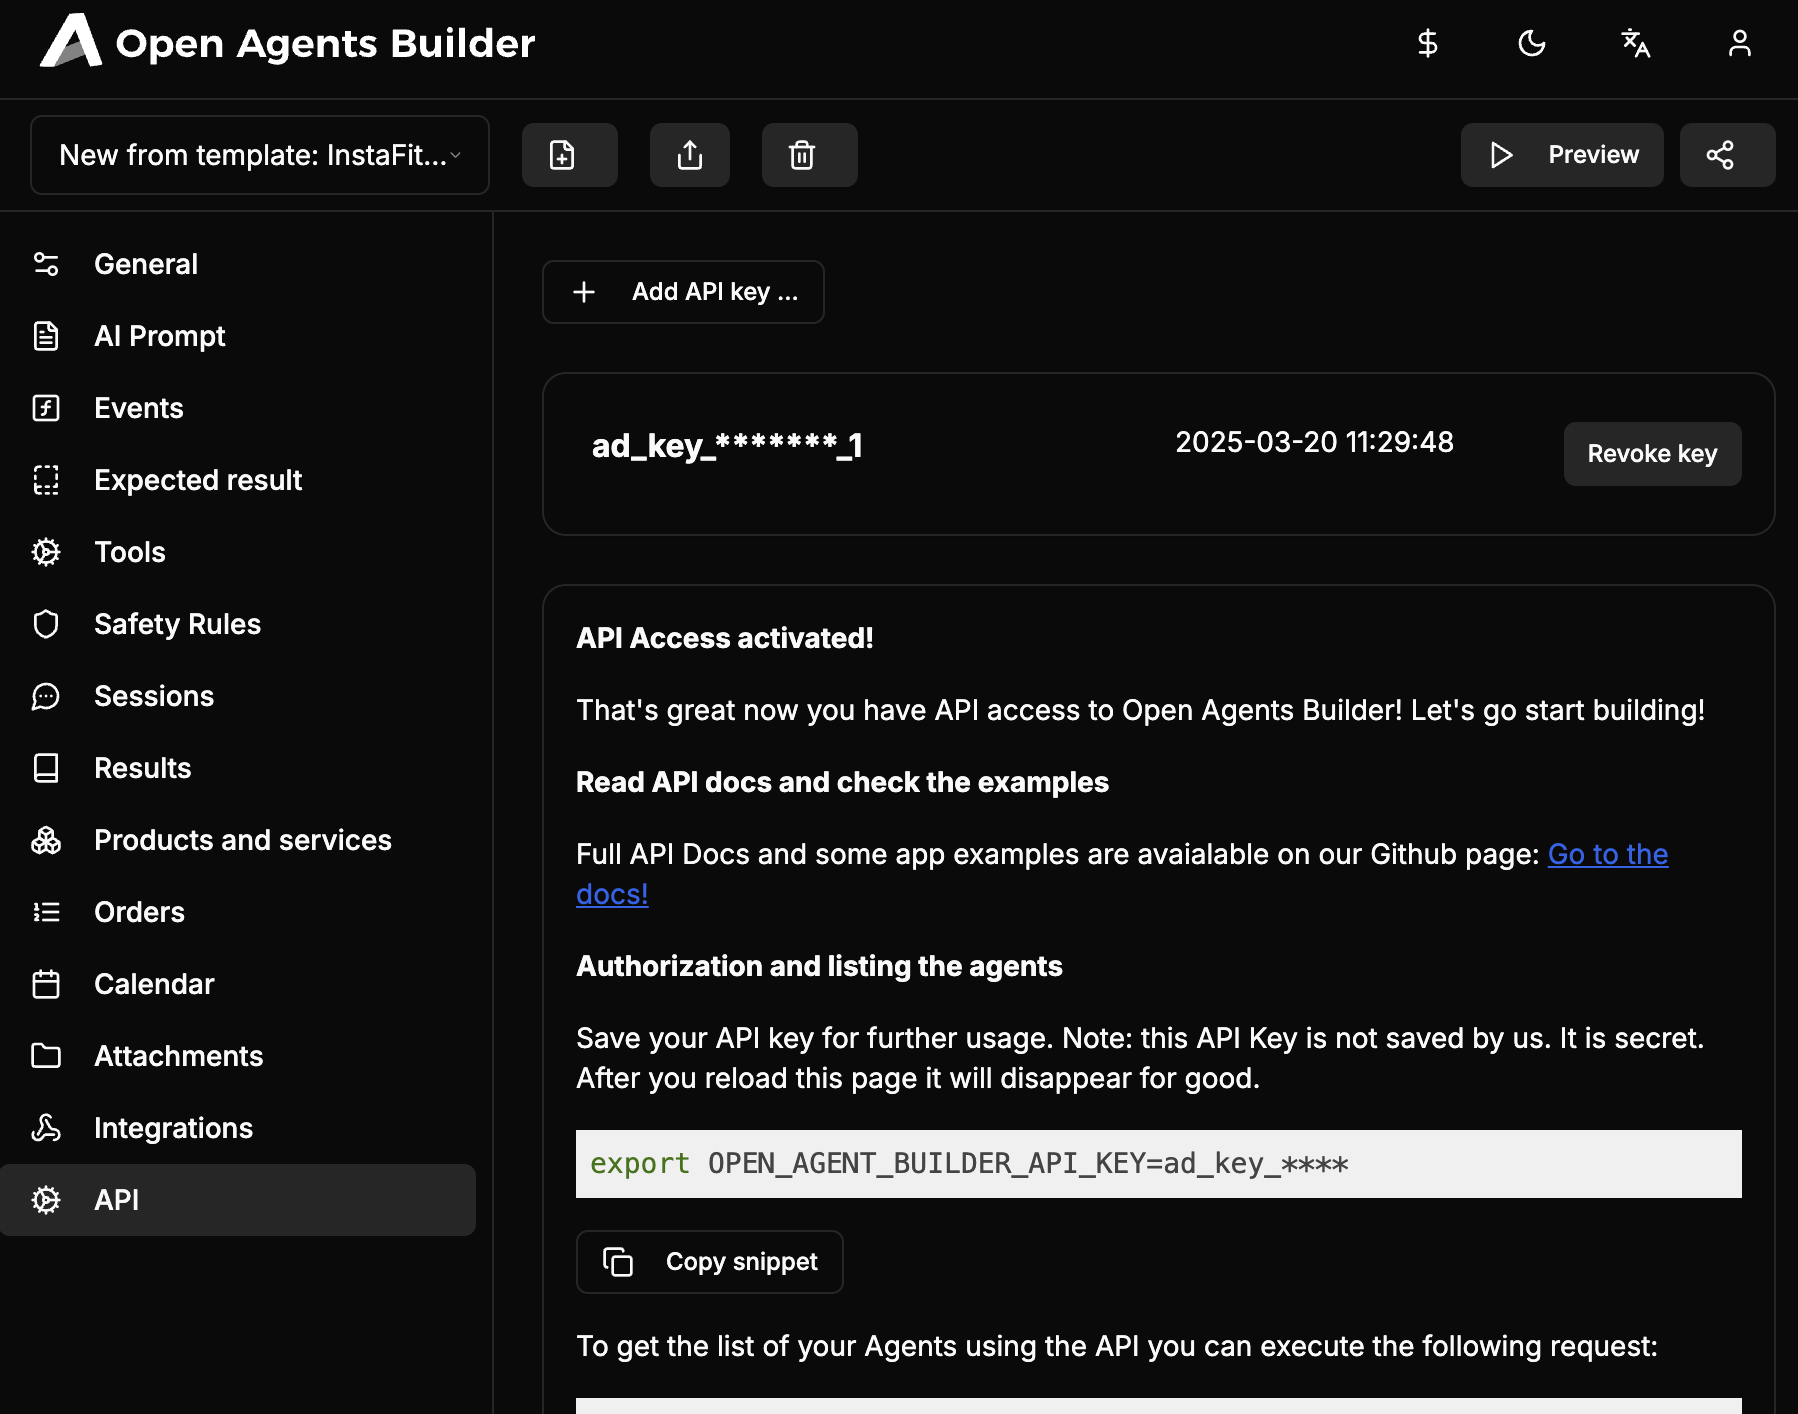
When you click Add API Key, a new API key will be generated, but note that it is not stored in the application. Once shown, it cannot be retrieved again, so be sure to copy and save it somewhere safe.
A good practice is to set it as an environment variable in your shell (e.g., in ~/.bashrc or ~/.zshrc) so it’s readily available:
export OPEN_AGENTS_BUILDER_API_KEY=ad_key_eyJhbGciOiJIUzI1NiJ9.eyJkYXRhYmFzZUlkSGFzaCI6IjM1ZjVjNWIx...When you open a new shell, this API key will be available as $OPEN_AGENTS_BUILDER_API_KEY.
Testing the API (via CURL)
To verify that the API works, run:
curl -X GET -H "Authorization: Bearer ad_key_eyJhbGciOiJIUzI1NiJ9.eyJkYXRhYmFzZUlkSGFzaCI6IjM1ZjVjNWIxMzlhN..." \ -H "database-id-hash: 35f5c5b139a6b569d4649b788c1851831eb44d8e32b716b8411ec6431af8121d" \ https://app.openagentsbuilder.com/api/agentOr, if you have exported the key as OPEN_AGENTS_BUILDER_API_KEY:
curl -X GET -H "Authorization: Bearer $OPEN_AGENTS_BUILDER_API_KEY" \ -H "database-id-hash: 35f5c5b139a6b569d4649b788c1851831eb44d8e32b716b8411ec6431af8121d" \ https://app.openagentsbuilder.com/api/agentUnderstanding database-id-hash
You’ll notice the database-id-hash header in each request. This header identifies your specific OAB database (unique per user account). It remains consistent across all API requests within a single OAB database or account.
If everything is set up correctly, the response should look like this:
[ { "id": "zb18x8kjoilNo-vL99r9s", "displayName": "New from template: InstaFit - fitness shop for Instagram", ... }, { "id": "m8r22uvT2_KsMODoEw9ag", "displayName": "New from template: Import and invoice orders", ... }, ...]This confirms that you can successfully retrieve your agents via the API.
Using the Official TypeScript Client
While you can continue using curl or other HTTP clients, the open-agents-builder-client library streamlines many tasks, provides full TypeScript definitions, and offers a modular approach for all the key API endpoints.
1. Installation
npm install open-agents-builder-client zodor
yarn add open-agents-builder-client zod2. Setup
import { OpenAgentsBuilderClient } from "open-agents-builder-client";
const client = new OpenAgentsBuilderClient({  // This URL can be changed if you're self-hosting.  baseUrl: "https://app.openagentsbuilder.com",  databaseIdHash: "YOUR_DATABASE_ID_HASH",  apiKey: "YOUR_API_KEY" // or set process.env.OPEN_AGENTS_BUILDER_API_KEY});
3. Example Usage
Listing Agents
client.agent.listAgents() .then((agents) => { console.log("Agents:", agents); }) .catch(console.error);Upserting a Product
client.product.upsertProduct({ sku: "PROD-XYZ", name: "Sample Product", description: "A wonderful product"}).then((resp) => { console.log("Product upserted:", resp);}).catch(console.error);Uploading or Upserting an Attachment
For small files or text attachments:
client.attachment.upsertAttachment({ storageKey: "unique-file-123", displayName: "myfile.pdf", mimeType: "application/pdf", content: "Optional text content"}).then((resp) => console.log("Attachment upserted:", resp)).catch(console.error);Note: For larger binary files, you’d typically use a
multipart/form-dataapproach. You can easily extendattachmentApito handle these cases.
Next Steps
- Check out the Open Agents Builder Example for a complete demo of how to integrate the client into a project.
- Explore additional endpoints like Orders, Calendar, Results, and more to fit your use case.
That’s it! You’re now set to develop against Open Agents Builder with a robust, typed client—or you can continue using your preferred HTTP client if that’s more convenient.