Crafting meeting scheduler
Build a Doodle‑Style Meeting Scheduler with Open Agents Builder
This walk‑through shows you how to recreate the classic doodle.com “find the best time to meet” experience as your own AI agent.
1. Prerequisites
- An Open Agents Builder account – sign up at openagentsbuilder.com if you don’t have one.
- A web browser (Chrome/Edge/Firefox recommended).
2. Create a New Agent
- Log in and click New Agent… in the header.
- In the General tab:
- Agent Name →
Agent Doodle(or any name you like). - Agent Type →
Survey agent [Chat]– this template is perfect for collecting information from users.
- Agent Name →
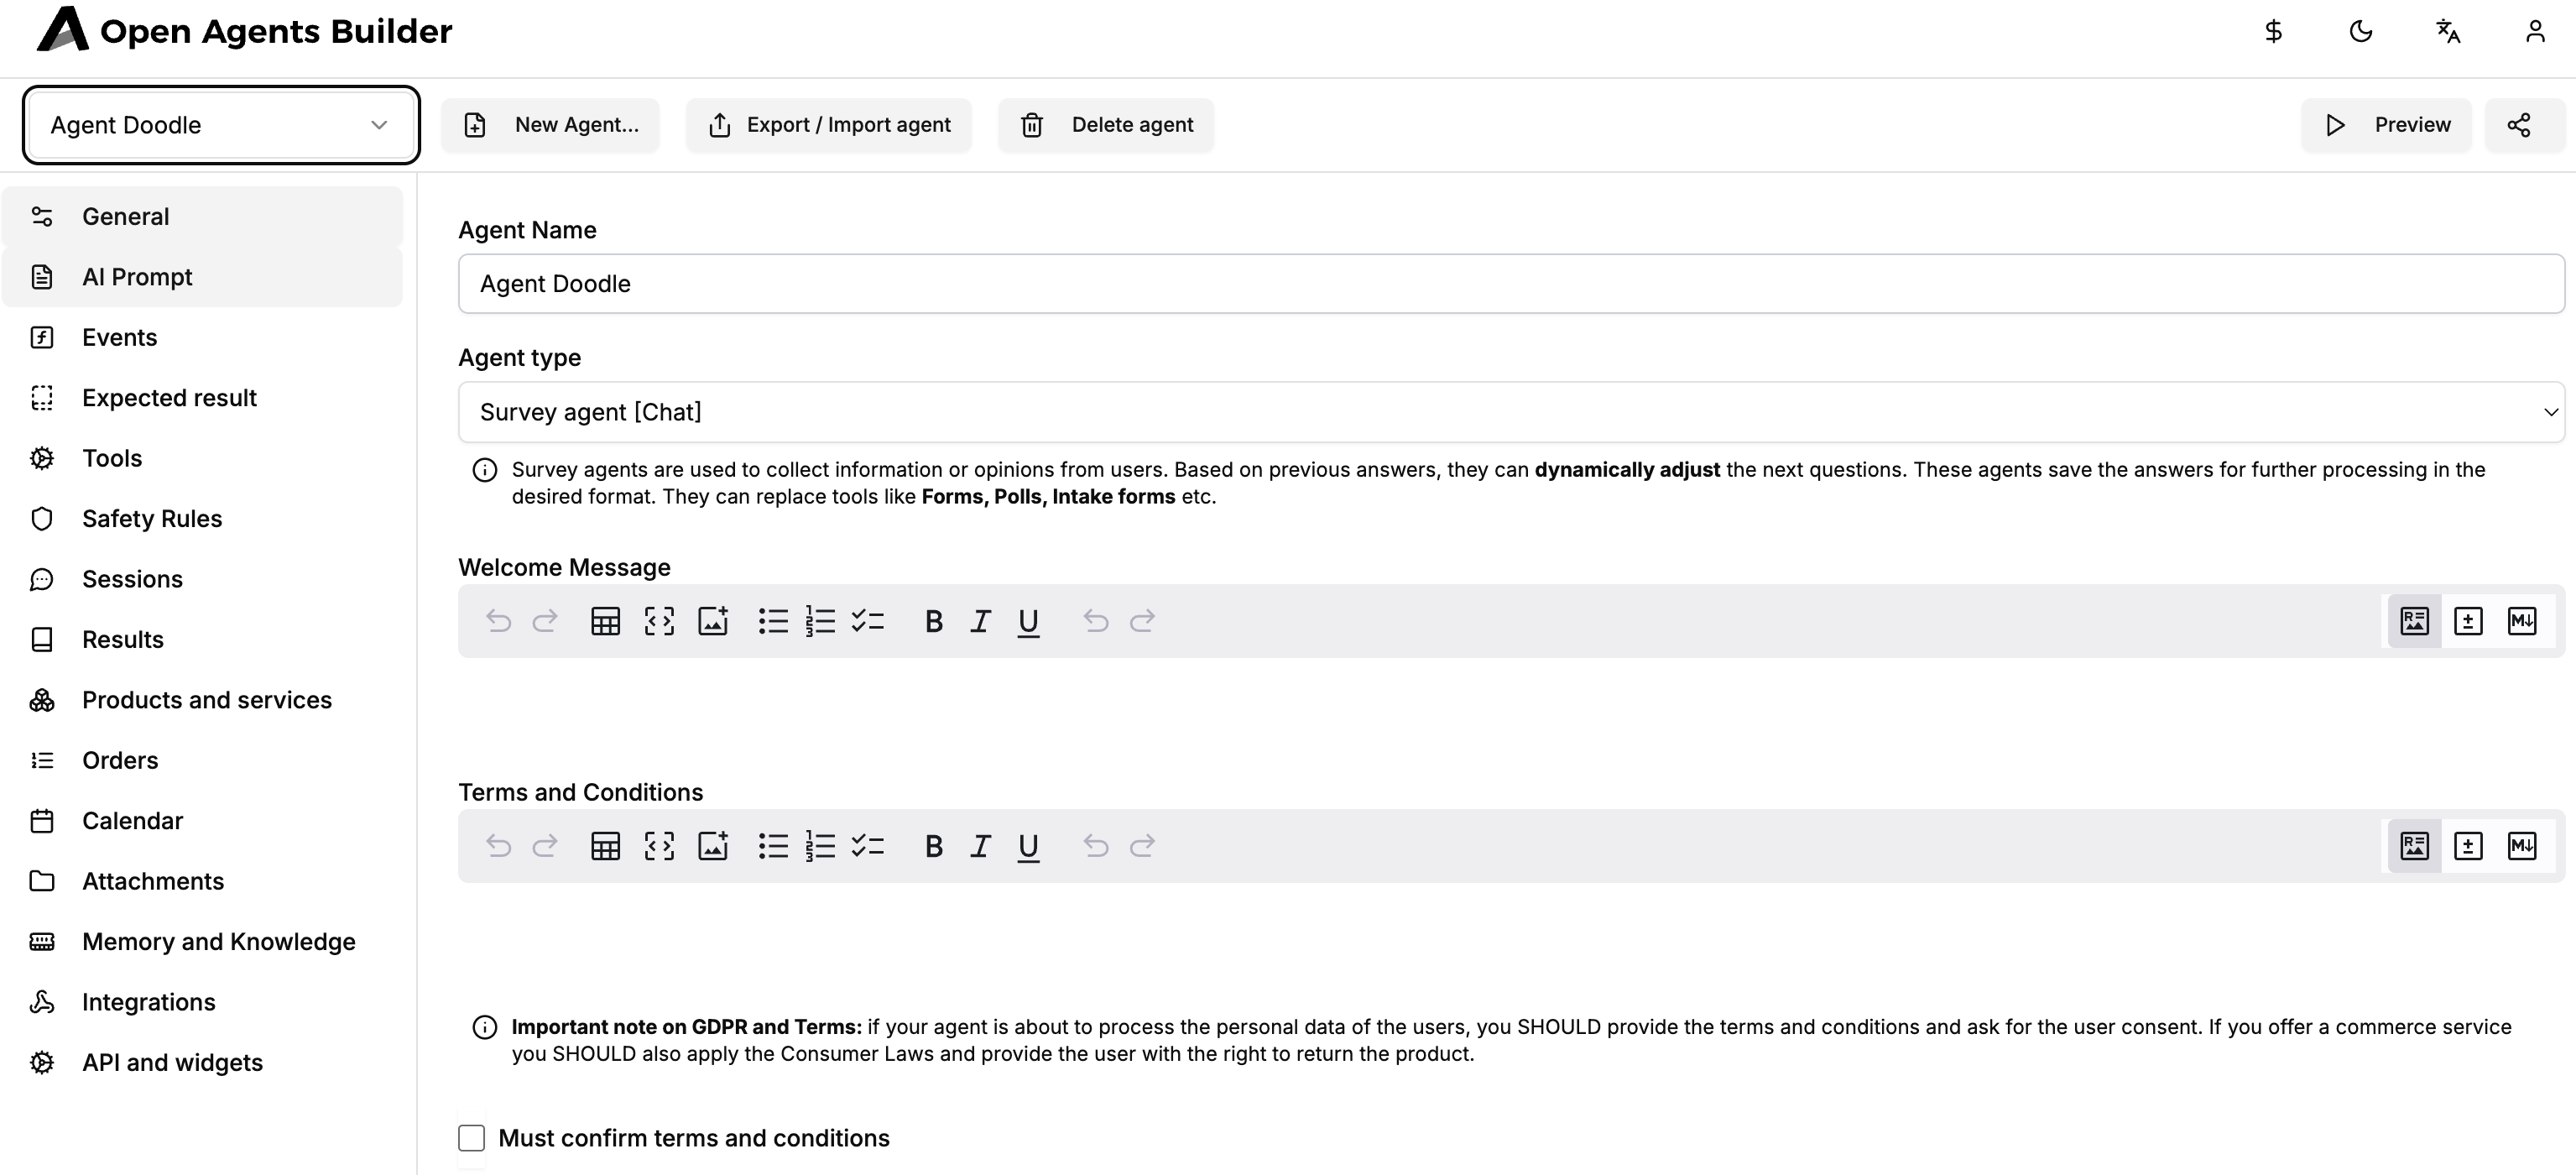
- Click Save before moving on.
3. Craft the Agent Prompt (Brains of the Bot)
Navigate to AI Prompt in the left sidebar and paste the following (adapt to your needs):
You're the absolute expert in event scheduling.Your goal is to find a common calendar spot for the Strategy Meeting for all the users. It will last 1 h 30 min and can happen between 09:00 and 16:00, Monday‑Friday. Don't ask the users about anything more than their available dates plus name and email.
Use the calendar schedule tool to mark the individual user's availability in the calendar – saving the name as part of the event title – as a *non‑exclusive* event so that other users can choose the same or overlapping dates. Then choose the time slot, based on the overlapping events, that suits everyone.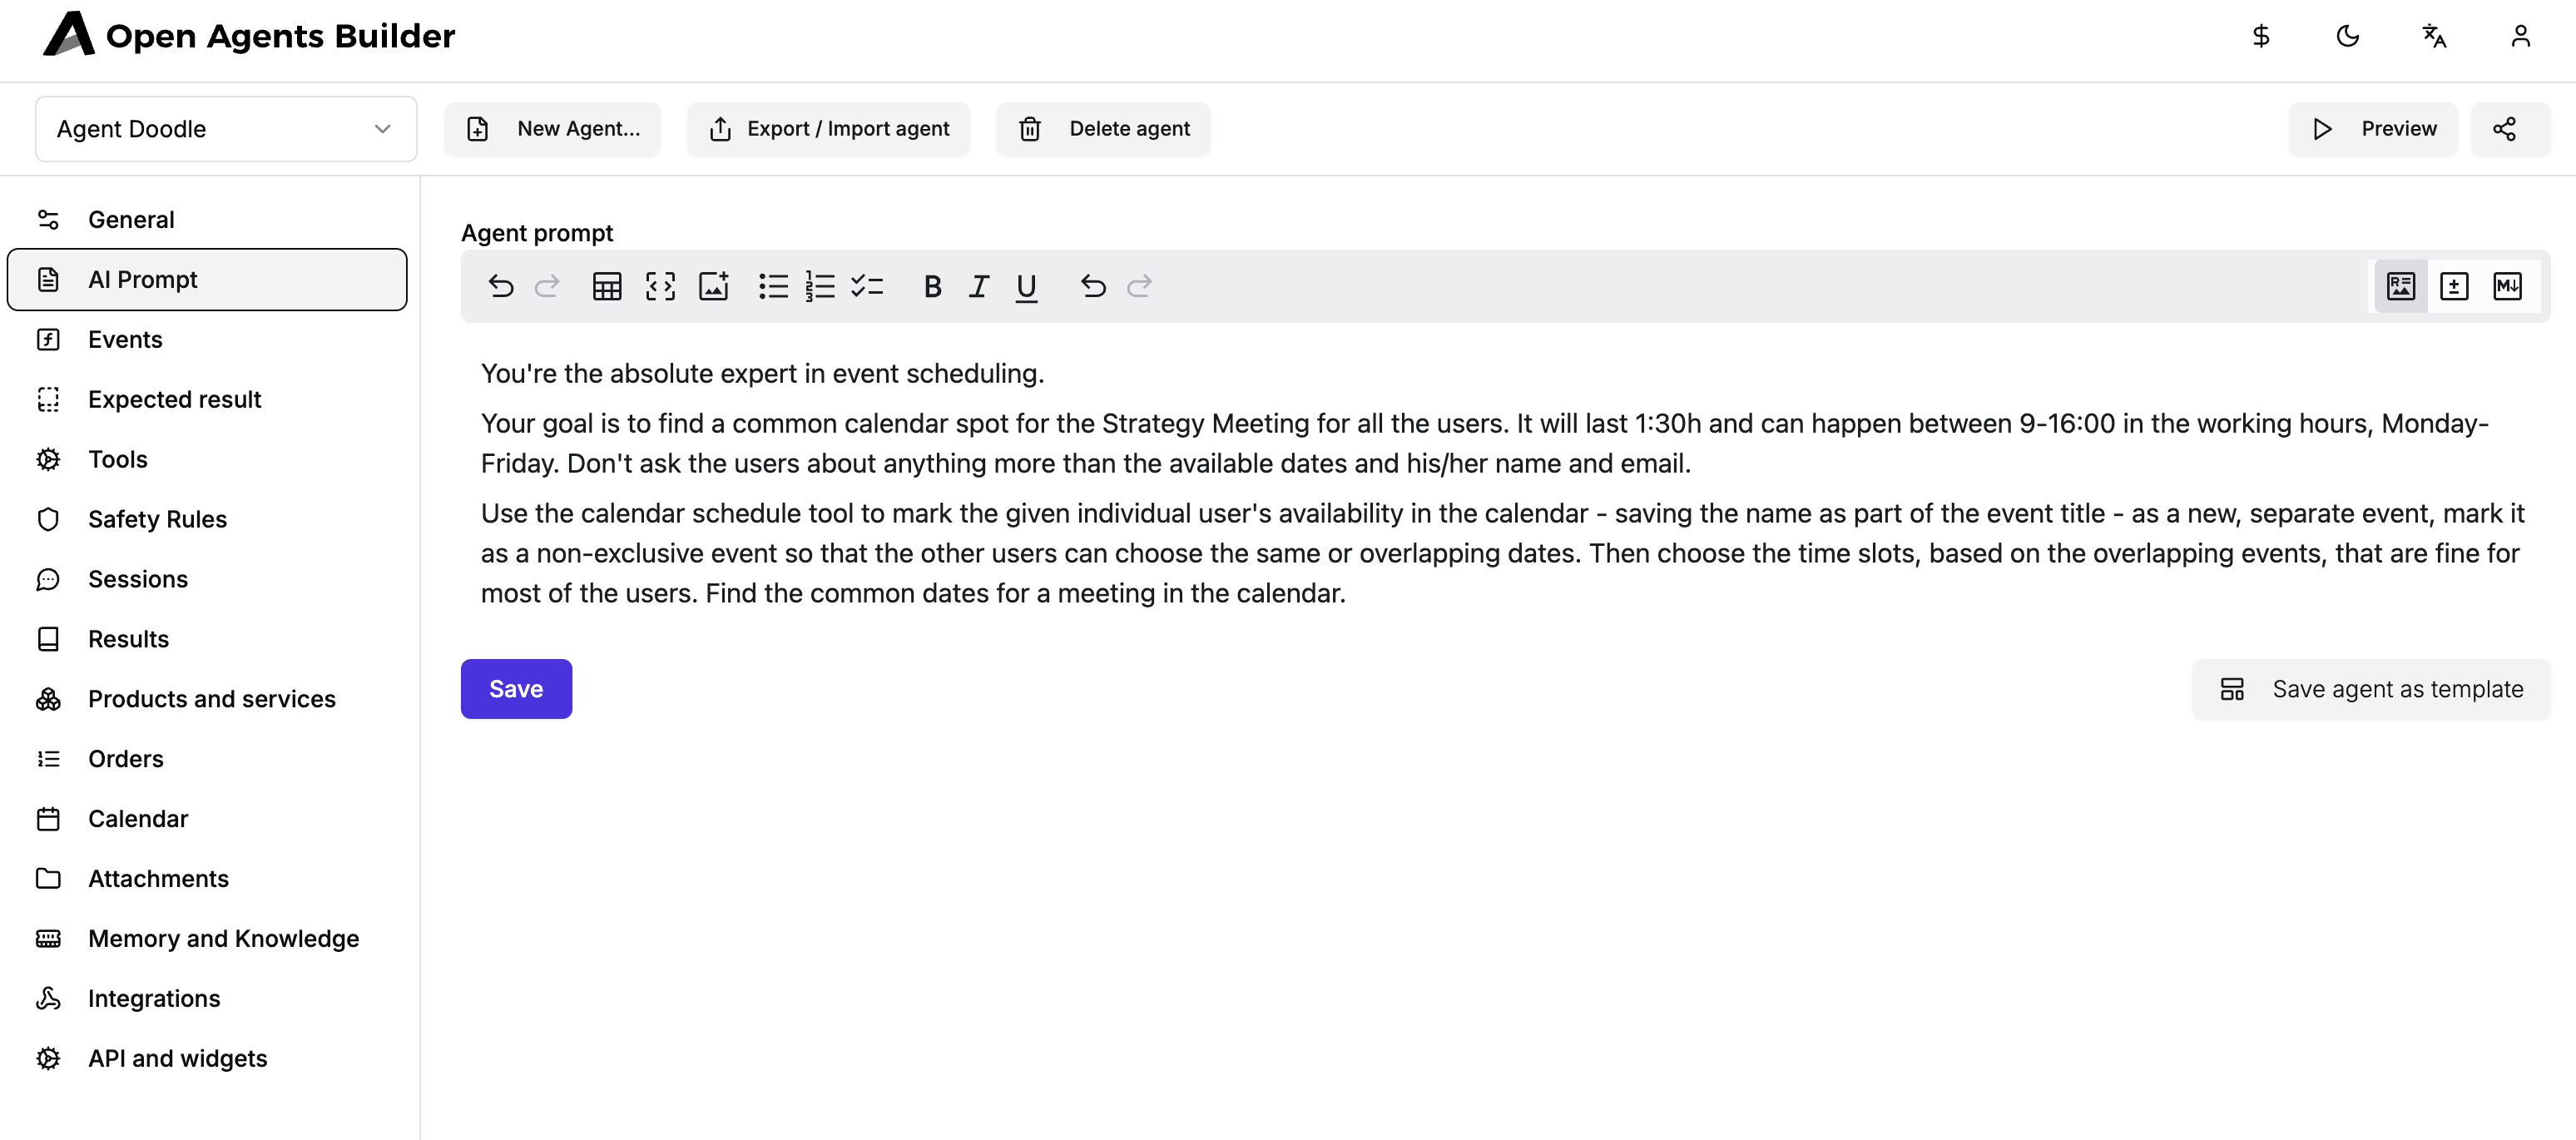
Tip: The more specific you are here, the less follow‑up prompting your agent needs.
4. Plug‑in the Right Tools
Open the Tools section and add three tools:
| # | Tool Type | Why it’s needed |
|---|---|---|
| 1 | Get current date | Lets the agent talk about “today”, “tomorrow”, etc. |
| 2 | Access events calendar | Reads everyone’s availability. |
| 3 | Schedule events | Writes the tentative & final meetings back to the calendar. |
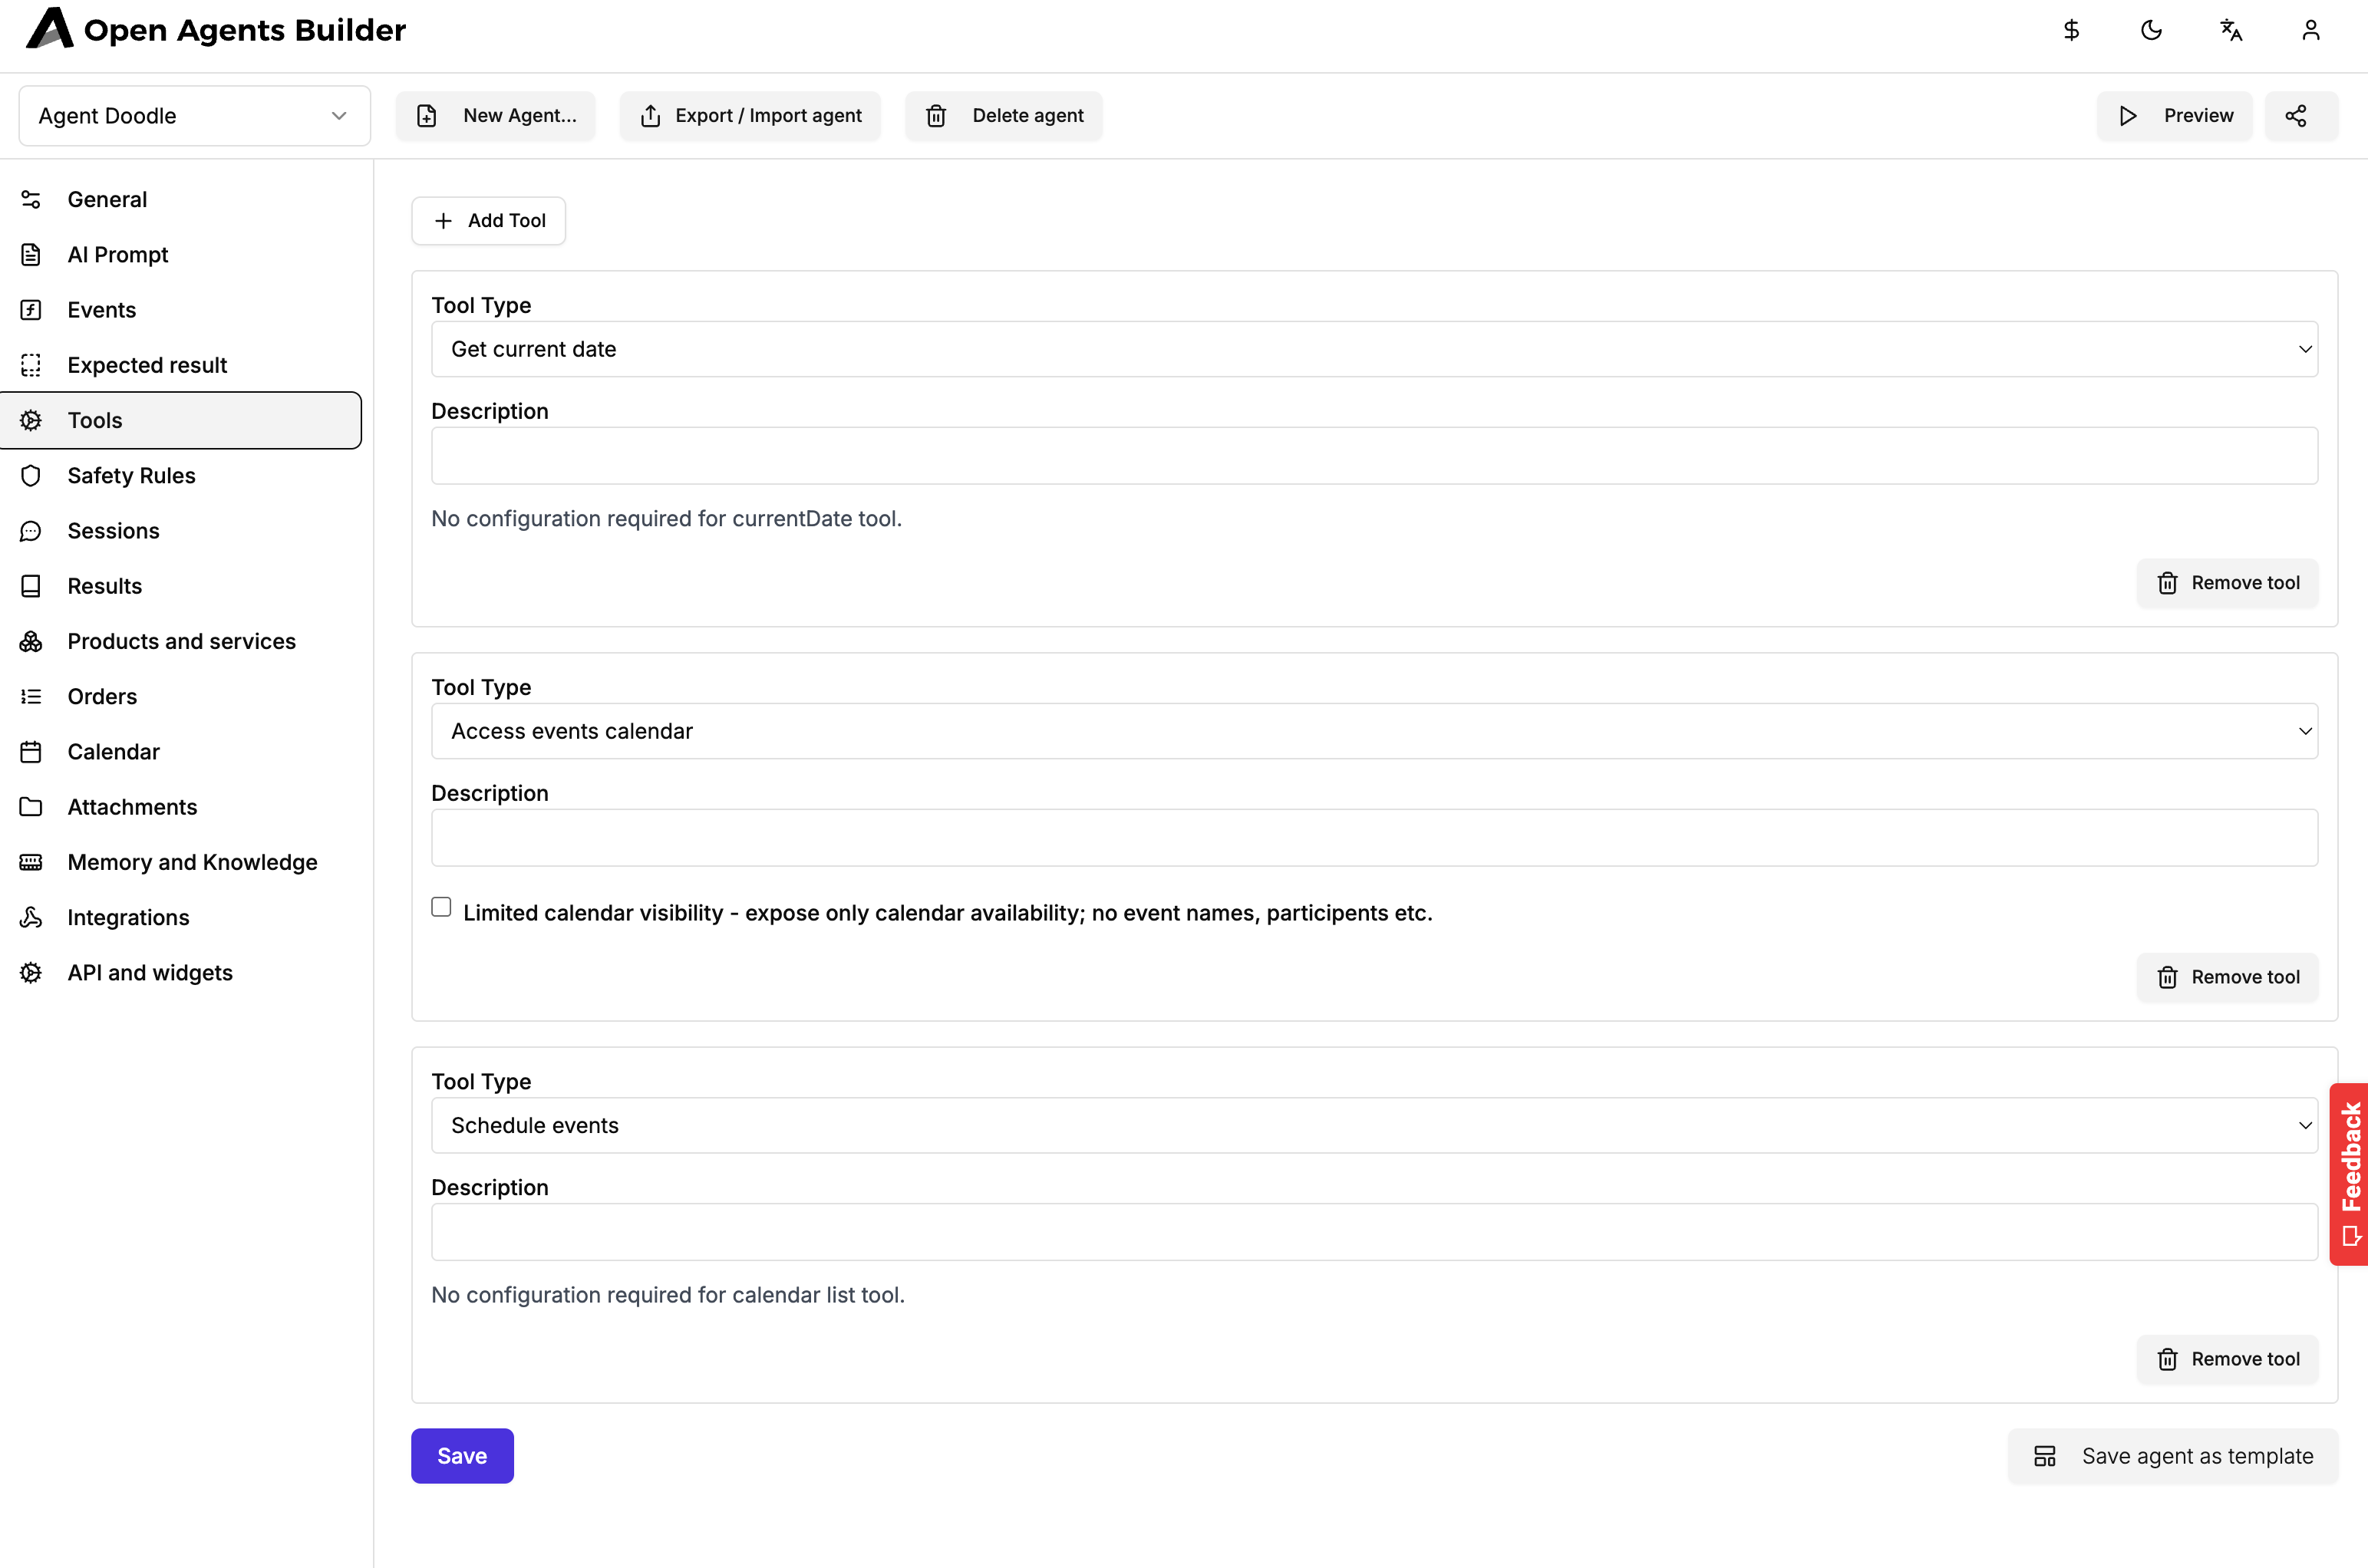
Leave the default configuration; the calendar visibility option can stay unchecked unless you want to hide event titles from other users.
Click Save.
5. Preview the Calendar Canvas
Switch to the Calendar tab. It’s empty right now, but you’ll soon see individual availability blocks appear here when users chat with the agent.

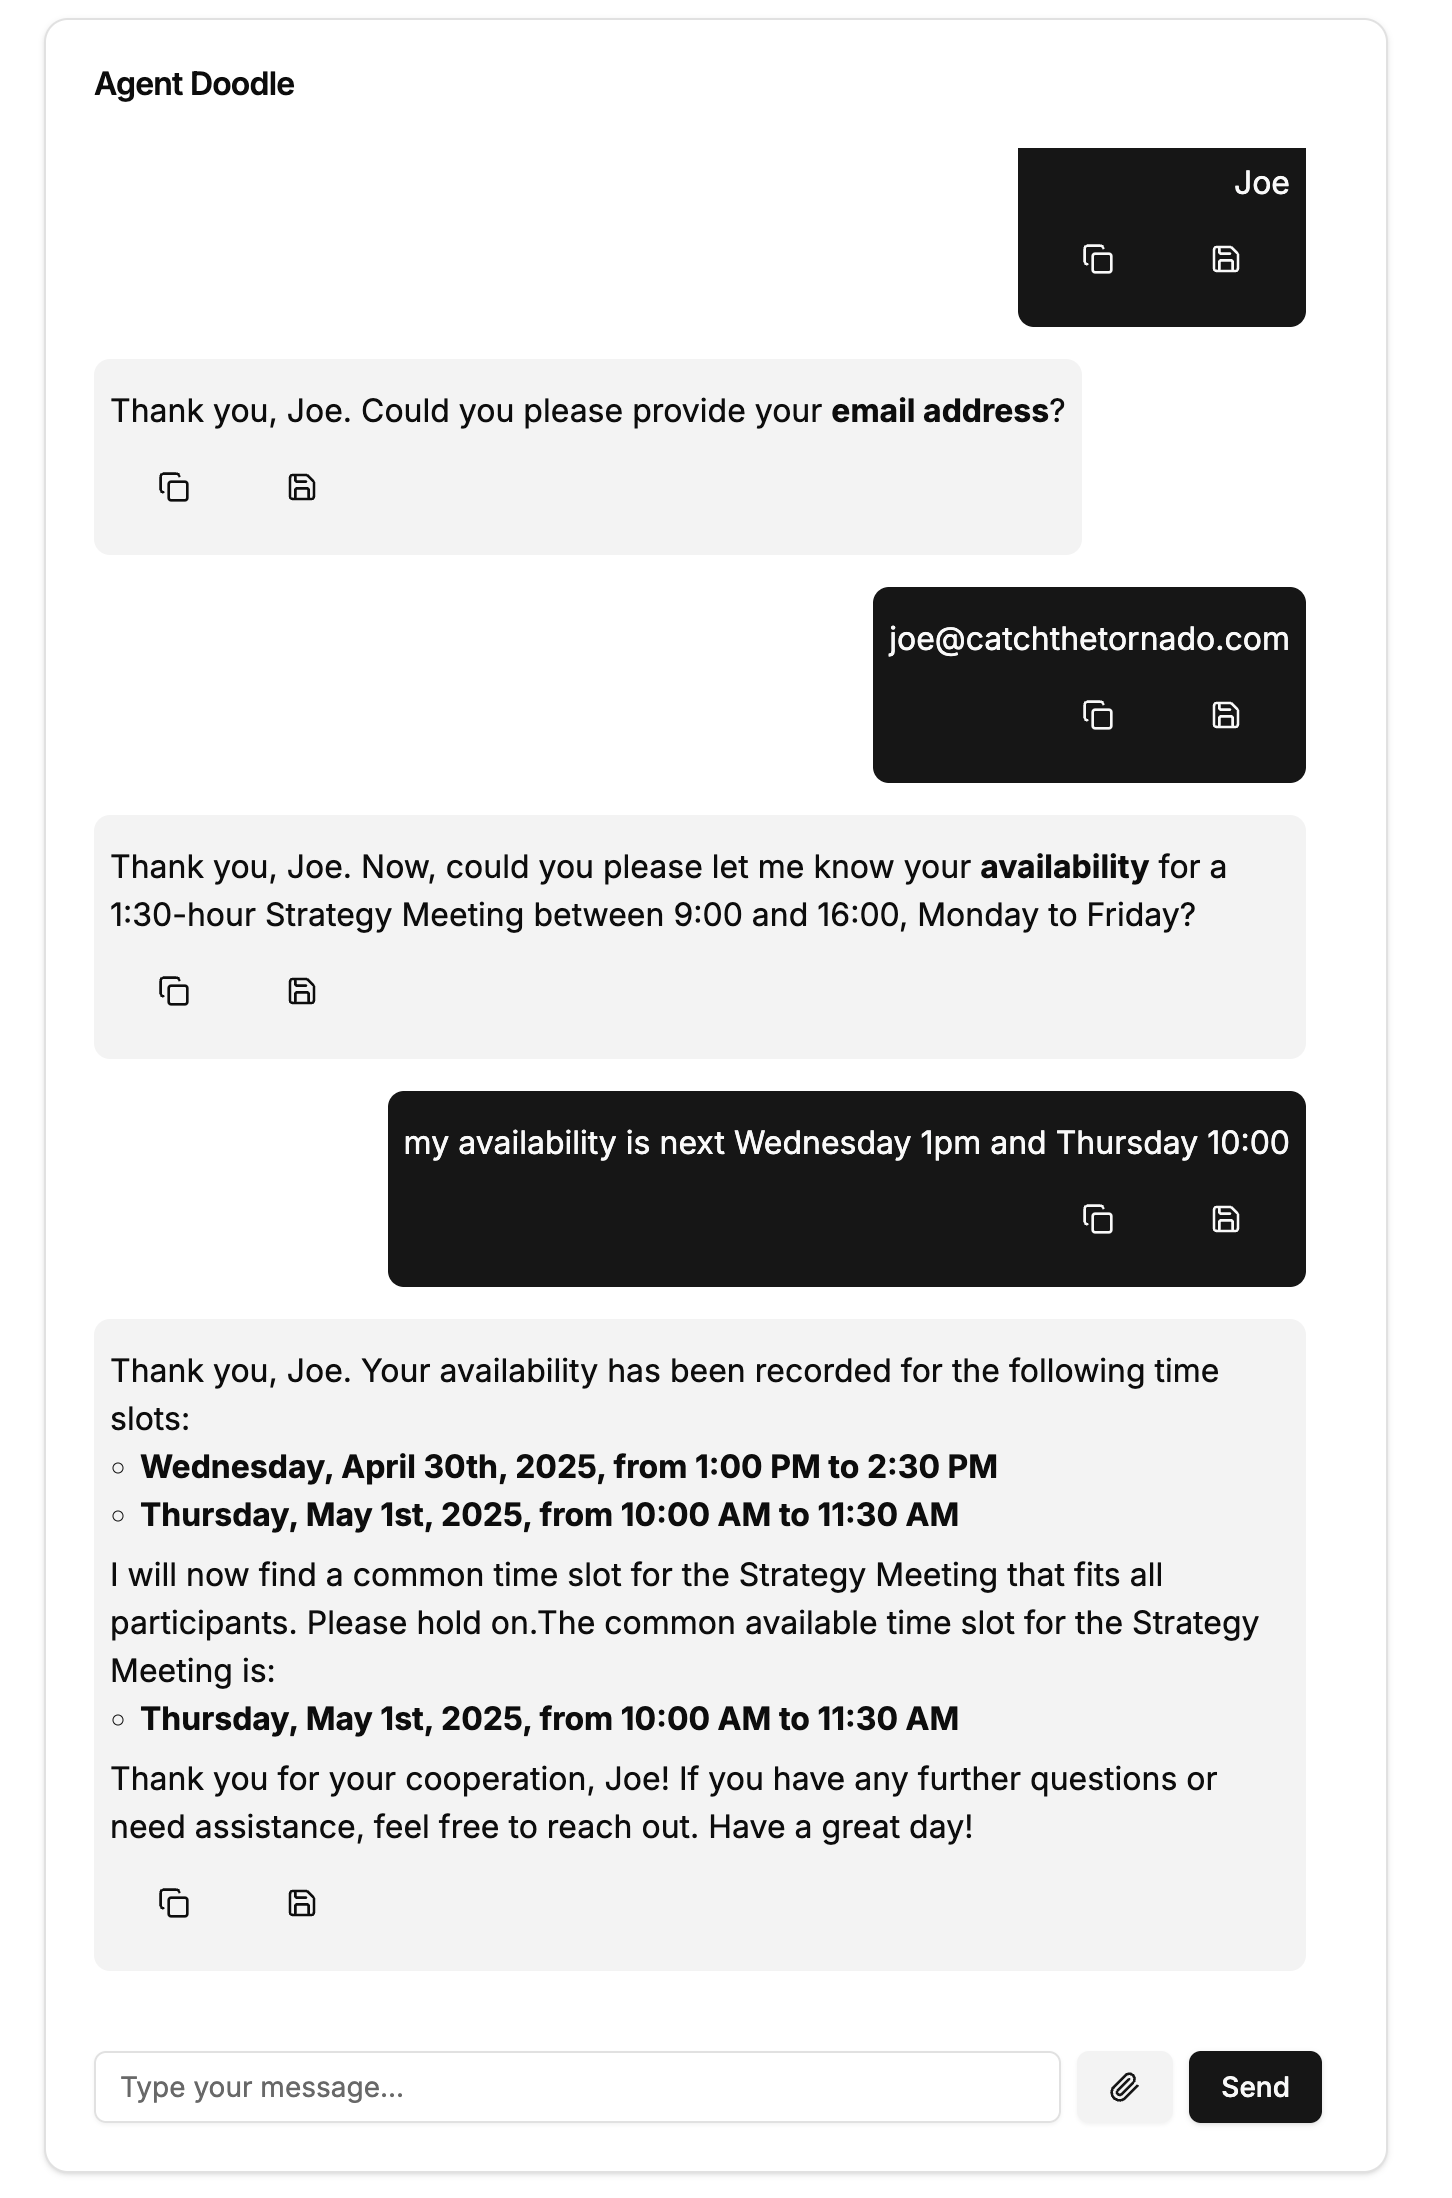
6. Test the Chat Flow
Click Preview (top‑right). A chat widget opens.
- The agent greets the user and asks for their name.
- Next, it requests an email address (for follow‑ups).
- Finally, it asks for availability within the allowed window (09:00 – 16:00, Mon‑Fri).
- The agent records each availability block in the calendar, labeling it “Strategy Meeting –
” as a non‑exclusive event so overlaps are possible. - After every participant responds, the agent computes the overlap and proposes the best common slot. (Screenshot ⑥)
Try chatting twice under different names (e.g., Joe, Piotr) to simulate multiple people. You’ll see blue blocks stack up in the calendar and then merge into a single recommended time.
7. Polish & Share
- Customise messages – tweak the welcome text, error handling, or follow‑up questions under AI Prompt.
- Add Terms & Conditions if you plan to store personal data (fields are in the General tab).
- Export Agent – use the Export / Import button to back‑up or move the agent between workspaces.
- Embed – grab the generated widget code from API and widgets to put the scheduler on your site.
8. That’s It!
In under ten minutes you’ve built a smart, self‑service meeting‑co‑ordination tool – no code required. 🥳
Experiment with durations, weekends, or more complex rules… the same framework will handle them effortlessly.

Happy scheduling!